How to Sew Pants With Zipper? (Simple Way Guide) Of 2023
Embarking on a sewing project can be both exciting and rewarding. Learning How to Sew Pants With Zipper opens up a world of possibilities, allowing you to create customized, well-fitted bottoms tailored to your style.
In this comprehensive guide, we will take you through the process step by step, ensuring a successful outcome even for beginners.

Gathering Materials
Before diving into the sewing process, make sure you have all the necessary materials at your disposal.
This includes fabric, a zipper, thread, scissors, and a sewing machine. Having everything ready will streamline the process and reduce interruptions.
Choosing the Right Fabric
The choice of fabric plays a crucial role in the comfort and appearance of your pants. Opt for a fabric that suits the occasion and climate.
Whether it’s denim for a casual look or a more elegant fabric for a formal setting, selecting the right material sets the foundation for a successful project.
Taking Measurements

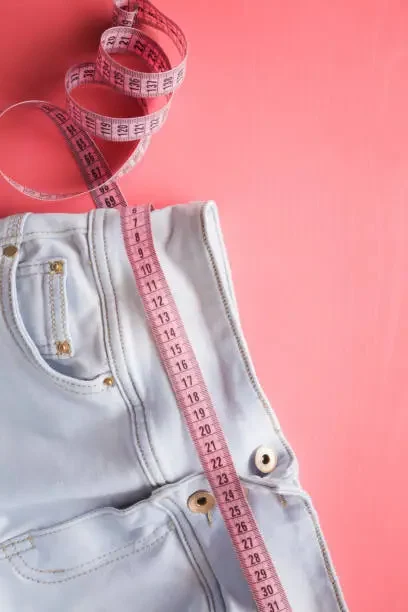
Accurate measurements are the key to well-fitted pants. Take your waist, hip, inseam, and outseam measurements to ensure the final product hugs your body in all the right places. A well-measured garment is a comfortable garment.
Taking accurate measurements for pants ensures a well-fitted and comfortable garment. To measure for pants, you’ll need a flexible measuring tape and a few key points:
- Waist: Measure around the natural waistline, where the waistband of pants typically sits. Ensure the tape is snug but not tight.
- Hips: Measure around the fullest part of your hips and buttocks. This measurement is crucial for the fit around the hips and seat of the pants.
- Inseam: Measure from the crotch down to the desired pant length. This determines how long the pants will be along the inner leg.
- Rise: For high-waisted or low-waisted pants, measure from the front waistband, between your legs, and up to the back waistband. This measurement determines the length of the crotch seam.
- Thigh: Measure around the fullest part of your thigh for pants that fit comfortably in this area.
- Knee and Calf: For specific styles or tailored fits, measuring around the knee and calf can be helpful to ensure the right taper or width in these areas.
Always measure against your skin or snug-fitting clothing for accuracy. Double-check each measurement to ensure precision before starting your pants project.
Pattern Selection
Explore different pant patterns that include zipper details. Choose a pattern that aligns with your skill level and desired style. Patterns often come with detailed instructions, making it easier for beginners to follow along.
Cutting Fabric
Cutting fabric is a foundational skill that forms the basis of every sewing project. Precision is key—ensuring straight, accurate cuts determines the success of your creation.
Using sharp scissors or a rotary cutter along with a clear cutting surface, you can transform fabric into the pieces that will ultimately compose your design.
Take measurements meticulously, mark the fabric thoughtfully, and cut with confidence. With practice, this fundamental skill becomes second nature, setting the stage for a seamless sewing experience.
Preparing the Zipper
Prepare the zipper by pressing it flat and ensuring it’s the correct length for your pants. A well-prepared zipper eases the sewing process and ensures a neat appearance.
Assembling the Front and Back Panels
Begin sewing by assembling the front and back panels. Follow the pattern instructions, and use the appropriate stitching techniques for a durable finish.
Inserting the Zipper
The zipper insertion is a critical step. Follow our detailed guide to seamlessly sew in the zipper, ensuring it not only functions correctly but also adds to the aesthetic appeal of your pants.
Attaching Waistband
Add a waistband for a polished look. This step provides structure and defines the waistline. Follow the pattern instructions to attach the waistband securely.
Creating Pockets (Optional)
If your pattern includes pockets, now is the time to add them. Pockets enhance functionality and style. Follow the provided instructions for a seamless integration.
Sewing the Inseam
Sewing the inseam is a pivotal step in garment construction, bringing together the front and back sections of pants or skirts.
This seam runs along the inner leg or crotch area, requiring precision and attention to detail for a comfortable and polished fit.
Aligning the fabric edges accurately, stitching with the right seam allowance, and reinforcing the seam for durability are crucial aspects of this process.
Mastering the inseam ensures a smooth, well-fitted garment, setting the stage for further refinement in your sewing journey.
Hemming the Pants
When it comes to hemming your freshly sewn pants, simplicity is key. After completing the main steps of sewing, follow these quick tips for a polished hem:
- Fold and Pin: Fold the raw edge of the fabric inside and pin it in place. Ensure that the fold is even along the entire hemline.
- Press the Fold: Use a hot iron to press the folded hem. This not only sets the fold but also makes it easier to sew a straight and even hem.
- Choose the Right Stitch: Opt for a straight stitch or a blind hem stitch on your sewing machine for a clean and discreet finish.
- Stitching the Hem: Sew along the folded edge, maintaining a consistent distance from the edge to create an even hem. Backstitch at the beginning and end to secure the stitching.
- Trim Excess Fabric (if necessary): If your pants are too long, trim any excess fabric before hemming to achieve the desired length.
- Final Press: Give the hem a final press with the iron to set the stitches and ensure a professional, crisp look.
Final Adjustments
Once you’ve completed the main steps, try on your pants and make any necessary adjustments for the perfect fit. Small tweaks can make a big difference in the overall comfort and appearance of the garment.
People also ask
How do you sew an invisible zipper in pants?
To sew an invisible zipper in pants:
Prepare Fabric: Interface the zipper area for stability. Press the seam allowance open where the zipper will be inserted.
Pin Zipper: Open the zipper and pin it facedown along one side of the seam, aligning the teeth with the seamline.
Baste: Baste the zipper in place using a long, easily removable stitch.
Sew Zipper: Using an invisible zipper foot, sew close to the zipper teeth on both sides, starting from the top and moving downward.
Check and Adjust: Close the zipper to ensure it’s properly aligned. If needed, adjust and re-stitch.
Secure Bottom: At the bottom, stitch across the seam allowance to secure the zipper end.
Repeat on Other Side: Repeat the process on the other side of the zipper.
Finish: Remove basting stitches, press the seam, and your invisible zipper in pants is complete.
How do you attach a zipper to fabric?
To attach a zipper to fabric:
Prepare Fabric: Interface the fabric where the zipper will be attached for stability.
Align Zipper: Place the zipper facedown on the fabric, aligning its teeth with the seam line.
Pin or Baste: Pin or baste the zipper in place to hold it securely.
Sew One Side: Using a zipper foot on your sewing machine, stitch one side of the zipper, keeping close to the teeth.
Repeat on Other Side: Repeat the process for the other side of the zipper.
Secure Ends: Stitch across the bottom to secure the zipper ends.
Check and Trim: Close the zipper to check alignment. Trim any excess zipper tape.
Finish: Remove basting stitches, press the seam, and your zipper is attached to the fabric.
What is the most common technique for inserting a pant zipper?
The most common technique for inserting a pant zipper is using the centered zipper method.
In this method, the zipper is placed along the center of the fabric seam, and both sides of the fabric are stitched close to the zipper teeth.
This creates a neat and symmetrical zipper installation commonly seen in the center-back or center-front of pants.
How do you sew a front fly zipper?
To sew a front fly zipper in pants:
Prepare Front Pieces: Interface the fly area for stability. Place the front pieces right sides together, leaving the fly area open.
Attach Zipper: Pin the zipper facedown along the fly opening, aligning its teeth with one side of the seam. Stitch close to the zipper teeth.
Fold and Stitch: Fold the fabric over the zipper, press, and stitch down the folded edge.
Topstitch Fly Front: Topstitch along the fly front for a finished look.
Attach the Other Side of the Zipper: Open the zipper and pin the other side along the remaining seam. Stitch close to the teeth.
Secure Bottom: Stitch across the bottom to secure the zipper ends.
Complete Fly Front: Fold the fabric back to conceal the zipper. Topstitch the other side of the fly for symmetry.
Finish: Press the seam, and your front fly zipper is complete.
Conclusion – How to Sew Pants With Zipper?
Mastering the art of sewing pants with a zipper is a valuable skill that opens up endless possibilities for creating well-fitted, personalized garments.
Following the steps outlined in this guide allows you to craft pants tailored to your measurements and style preferences.
By choosing the right fabric, zipper, and sewing techniques, you can confidently create pants that fit comfortably and look professionally finished.
Embrace the process, pay attention to detail, and enjoy the satisfaction of sewing a wardrobe staple that reflects your individuality.

Hi, I am Alice, and I am your perfect guide to the world of sewing machines. With over 10 years of experience in the sewing industry, I am passionate about sharing my knowledge and expertise to help you make the most of your sewing journey. about me


