How to Sew Patches on a Jacket? (Best Way Explain) In 2024
Sewing patches on a jacket isn’t just about mending fabric; it’s a creative expression that adds personality to your attire.
How to Sew Patches on a Jacket? Whether you’re mending a beloved jacket, upcycling an old piece, or embellishing a new creation, the art of hand-sewing patches allows you to infuse your personality into your clothing.
In this guide, we’ll explore the fundamental steps and techniques to master this timeless craft.
So, thread your needle, choose your patches, and let’s dive into the rewarding world of hand-sewing to transform your clothing into unique, customized pieces.
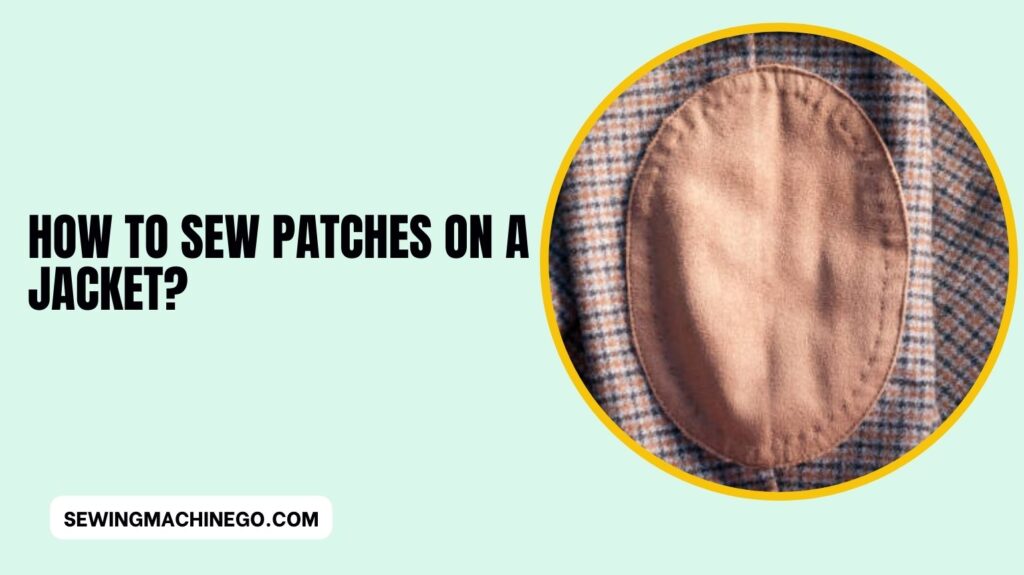
How to Sew Patches on a Jacket?
Patches on jackets have become more than just a means to cover holes; they’re a fashion statement, a way to showcase individuality.
Whether you’re mending a beloved jacket or enhancing a new one, the process of sewing patches is an art form that anyone can master.
Selecting the Right Patch
Before diving into the sewing process, take a moment to choose patches that resonate with your style. Consider the design, color, and material of the patch, ensuring it complements the jacket’s overall aesthetic.
Preparing the Jacket
For a seamless patch application, start by giving your jacket a good clean. This ensures the patch adheres properly. Additionally, choose a visible yet harmonious spot on your jacket to showcase the patch’s design.
Gathering Necessary Tools
You don’t need a fully stocked sewing room to sew patches. Basic tools like a needle, thread, and pins will suffice. Raid your home for these essentials or invest in a beginner’s sewing kit.
Choosing the Right Thread and Needle
The longevity of your patches depends on using the right thread and needle. Ensure the thread matches the patch’s material and select a needle suitable for both the patch and jacket fabric.
Securing the Patch Placement
Before sewing, it’s crucial to secure the patch in place. Use pins to keep it aligned and symmetrical. This step prevents shifting during the sewing process.
Basic Sewing Techniques
Sewing patches onto a jacket requires a mastery of basic sewing techniques. Whether you’re a novice or a seasoned seamstress, understanding and perfecting these fundamental stitches will ensure your patches are applied seamlessly.
Let’s delve into the basics.
1. Running Stitch: The Foundation
The running stitch is the simplest and most commonly used stitch in sewing patches. It involves creating a straight, continuous line of stitches. Here’s how you can master it:
Steps:
- Thread your needle and knot the end.
- Insert the needle from the backside of the fabric, pulling it through to the front.
- Create evenly spaced stitches along the patch’s edge.
- Continue until the patch is securely attached.
- Knot the thread on the backside to secure the stitch.
This stitch is ideal for securing patches and is easy to learn for beginners.
2. Backstitch: Reinforcing for Durability
If you want added durability and strength in your patch application, the backstitch is your go-to. It prevents the stitches from unraveling and provides a more secure hold.
Steps:
- Start with a single running stitch.
- Instead of moving forward, insert the needle backward, creating a second stitch.
- Bring the needle forward, passing through the end of the first stitch.
- Repeat the process, creating a continuous line of overlapping stitches.
This technique is particularly useful for patches on high-stress areas, ensuring they withstand wear and tear.
3. Whip Stitch: Neat Edge Finish
When you want a clean and tidy finish around the edges of your patch, the whip stitch is the way to go. It’s excellent for preventing fraying and giving your patches a polished look.
Steps:
- Bring the needle up through the fabric, close to the patch’s edge.
- Pass the needle over the edge and back down through the fabric.
- Repeat this process, creating a series of diagonal stitches along the patch’s perimeter.
The whip stitch is versatile and adds a decorative touch to your patches while securing the edges.
4. Blanket Stitch: Decorative and Functional
A blanket stitch is a decorative option that not only reinforces the edges but also adds a charming border to your patches. It’s especially popular for patches with intricate designs.
Steps:
- Start with the needle coming up through the fabric.
- Insert the needle back down, creating a loop around the patch’s edge.
- Before pulling the loop tight, pass the needle through it.
- Continue this process, creating evenly spaced loops along the edge.
The blanket stitch is both functional and visually appealing, making it a favorite for those who want to showcase their sewing skills.
5. Slip Stitch: Invisible and Seamless
For a nearly invisible finish, especially when attaching patches to delicate fabrics, the slip stitch is the ideal choice. This technique hides the stitches, creating a seamless look.
Steps:
- Bring the needle up through the fabric, close to the patch’s edge.
- Insert the needle into the fold of the patch, bringing it out through the fabric.
- Repeat this process, creating small, discreet stitches that are hidden within the patch’s fold.
The slip stitch is perfect for those who prefer a subtle finish that doesn’t distract from the patch design.
Mastering these basic sewing techniques opens the door to endless possibilities for creatively applying patches to your jacket.
Experiment with different stitches to find the style that suits your preferences and the aesthetic of your patches. Happy stitching!
Adding Extra Flair: Decorative Stitches
Elevate your patch game by incorporating decorative stitches. Experiment with unique patterns that enhance the patch’s design, making it a standout feature on your jacket.
Ensuring Longevity: Reinforcement Tips
To prevent your patches from fraying or falling off, reinforce the edges with additional stitches. If you’re extra cautious, a bit of fabric glue can provide extra support.
Troubleshooting Common Issues
Sewing patches on a jacket is a creative endeavor, but it’s not without its challenges. Here’s a quick guide to troubleshoot common problems and ensure your patching process goes smoothly:
Uneven Stitches:
If your stitches are turning out uneven, check your thread tension. Ensure it’s neither too loose nor too tight. Practice consistent stitching to create a neat and uniform appearance.
Loose Threads:
To combat loose threads, double-check your knotting technique. Ensure your starting and ending knots are secure. If threads continue to unravel, consider applying a small amount of fabric glue to reinforce the stitches.
Shifting Patches:
Patches that move during the sewing process can result in misalignment. To prevent shifting, use quality straight pins to secure the patch in place before you start sewing. Ensure it’s centered and symmetrical.
Fraying Edges:
Fraying is a common issue, especially with delicate fabrics. Combat this by reinforcing the patch’s edges with additional stitches. For extra security, apply a thin layer of fabric glue along the edge to prevent further fraying.
Knots Getting Tangled:
Tangled knots can be frustrating. When starting a new thread, create a secure knot close to the fabric. If you notice tangles forming during sewing, pause and untangle before continuing.
Needle Breakage:
If your needle keeps breaking, it may be too thin or dull for the fabric. Opt for a stronger needle and ensure it’s suitable for the jacket material. Slow down your stitching pace to reduce the risk of breakage.
Crooked Stitches:
Crooked stitches can detract from the neat appearance of your patches. Pay close attention to your stitching line. If needed, mark a straight guideline on the fabric with a fabric pencil or chalk to follow as you sew.
Puckering Fabric:
Puckering occurs when the fabric gathers around the stitches. To prevent this, use an appropriate needle size for your fabric thickness. Adjust your stitching speed and tension to create smooth, even stitches.
Wrinkled Patch:
If your patch looks wrinkled after sewing, your fabric may not be flat. Ensure the jacket is smooth and taut when pinning the patch. Iron the patch before sewing to remove any wrinkles.
Color Bleeding:
To prevent colors from bleeding into the jacket fabric, especially if the patch is vibrant, test the patch on a small, inconspicuous area first. If bleeding occurs, consider treating the patch with a color fixative before sewing.
Caring for Your Patched Jacket
Maintaining your patched jacket is essential for its longevity. Follow specific cleaning and care instructions to preserve both the jacket and the patches in pristine condition.
Upcycling Old Patches
Don’t discard those old patches—repurpose them! Upcycling old patches is a creative and eco-friendly way to breathe new life into your jacket.
Experiment with different arrangements, combine patches for a fresh look, and transform your jacket into a unique piece that tells a story.
Upcycling not only reduces waste but also adds a touch of nostalgia to your wardrobe. Get inspired and give your old patches a second chance to shine!
Personalization: Making it Yours
Transforming your jacket into a personal masterpiece is all about expressing yourself. Here’s a brief guide to making it uniquely yours:
Select Meaningful Patches:
Choose patches that hold significance for you. Whether they represent your interests, memories, or aspirations, each patch should tell a story.
Creative Arrangement:
Experiment with the placement of patches. Create your visual narrative by mixing and matching sizes, colors, and themes. Let your creativity shine.
Signature Stitches:
Add a personal touch to your patches with unique stitching patterns. Whether it’s a custom stitch or a signature detail, let your handiwork speak volumes.
Embrace Asymmetry:
Don’t be afraid to break the mold. Embrace asymmetry and irregular arrangements for a look that’s authentically yours.
Reflect Your Style:
Make sure your patched jacket reflects your style and personality. Whether it’s bold and vibrant or subtle and refined, let it be a true reflection of you.
Inspiration: Showcasing Patched Jackets
Explore the world of patched jackets by checking out inspiring images and stories. Stay updated on patching trends, and let your creativity flow.
People also ask
What is the best stitch to sew on a patch?
The running stitch is the go-to for attaching patches. Simple and effective, it provides a secure hold while allowing flexibility.
It’s beginner-friendly, ensuring a smooth application for any patch, big or small.
How do you securely sew on a patch?
To securely sew on a patch:
Position and Pin: Place the patch in the desired location and pin it in place.
Thread Selection: Choose a strong and matching thread for durability.
Anchor Stitch: Start with a few anchor stitches to secure the patch.
Sew Around Edges: Use a tight, even stitch to sew around the edges of the patch, ensuring it’s securely attached.
Knot the Thread: Knot the thread at the end, and if possible, sew a few additional stitches on the reverse side for extra security.
Press if Needed: Press the patch if the fabric allows.
How do you hand-sew patches on a letterman jacket?
To hand-sew patches on a letterman jacket:
Position Patches: Arrange patches on the jacket to determine their placement.
Pin in Place: Pin the patches to secure them in position.
Thread Selection: Choose a sturdy, matching thread for sewing.
Anchor Stitch: Start with anchor stitches to secure the patch at one point.
Sew Around Edges: Use a tight, even stitch to sew around the edges of the patch.
Secure Corners: Reinforce corners and curves with additional stitches.
Knot and Finish: Knot the thread at the end and secure it with extra stitches on the reverse side.
Press if Needed: Optionally, press the patches to ensure they lay flat.
Can you sew through iron on patches?
Sewing through iron-on patches is possible, but it’s important to use a strong needle and go through the fabric and patch carefully.
The adhesive on iron-on patches may make sewing more challenging, so choose a sturdy needle, such as a denim or heavy-duty needle, and sew slowly to avoid gumming up the needle.
Conclusion
In conclusion, mastering the art of sewing patches onto a jacket is a valuable skill that allows for personalization and style.
By following the steps outlined in this guide, you can seamlessly attach patches to your jacket, transforming it into a unique and customized garment.
Remember to choose high-quality materials, take your time with each step, and enjoy the creative process.
Whether you’re adding a touch of nostalgia or making a bold statement, sewing patches is a straightforward yet rewarding endeavor that allows you to showcase your individuality through your fashion choices.

Hi, I am Alice, and I am your perfect guide to the world of sewing machines. With over 10 years of experience in the sewing industry, I am passionate about sharing my knowledge and expertise to help you make the most of your sewing journey. about me