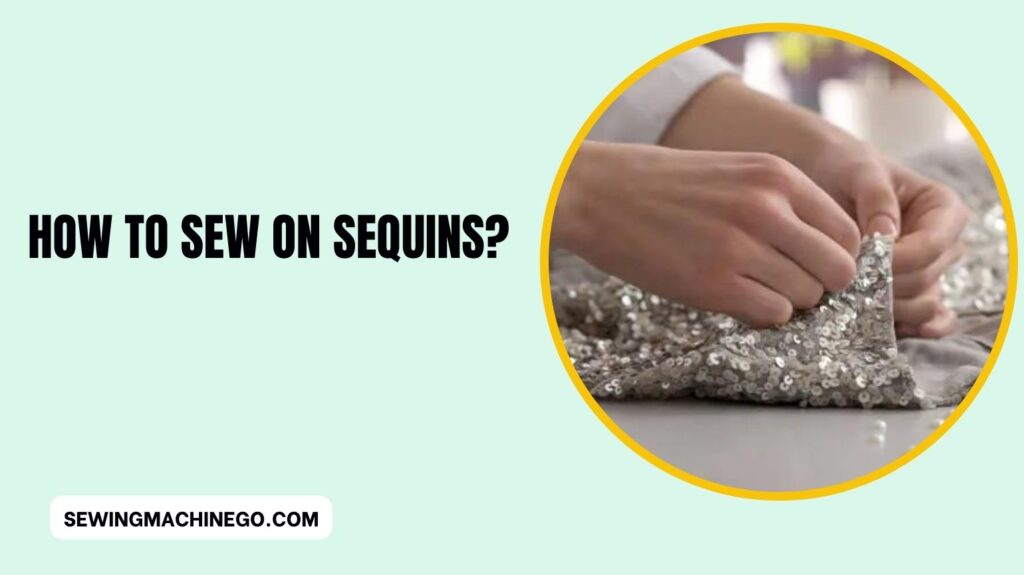
How to Sew on Sequins? (Very Easy Way Explain) In 2023
Sewing on sequins can add a touch of glamour and sophistication to your clothing and accessories. How to Sew on Sequins?
Whether you’re customizing a dress for a special occasion or enhancing a simple clutch, mastering the art of sewing on sequins can elevate your creations.
In this comprehensive guide, we’ll explore the step-by-step process of adding sequins to fabric, ensuring a dazzling and professional finish.
Materials Needed
Before you embark on your sequin-sewing journey, gather the essential materials to ensure a smooth and enjoyable crafting experience. Here’s a comprehensive checklist:
1. Sequins
Ensure you have an ample supply of sequins in your preferred size, color, and style. Consider the design of your project when selecting sequins, whether they’re flat, cup-shaped, or faceted.
2. Needles
Choose high-quality needles suitable for sequin work. Opt for those with a larger eye for easier threading, especially if you’re using multiple strands of thread.
3. Thread
Select a strong and durable thread that complements your sequins. The thread color should blend well with the fabric and sequins, providing a cohesive and polished look.
4. Fabric
Choose the right fabric for your project. Consider the weight and texture, ensuring it can support the sequins without stretching or tearing. Lighter fabrics may require extra care during sewing.
5. Fabric Markers or Chalk
Use fabric markers or chalk to sketch your sequin placement and design directly onto the fabric. This serves as a helpful guide, ensuring precision in your sequin arrangement.
6. Scissors
Have a pair of sharp scissors on hand for cutting thread and trimming excess fabric. Precision is crucial, especially when dealing with intricate sequin designs.
7. Thimble
Protect your fingers from potential needle pricks by using a thimble, especially when working with denser fabrics that may require additional force.
8. Embroidery Hoop
Consider using an embroidery hoop to keep your fabric taut while sewing. This helps maintain even tension and facilitates smoother stitching.
9. Pins
Use pins to secure your fabric and sequins in place before sewing. This ensures that everything stays in position, preventing misalignment or shifting.
10. Magnifying Glass or Task Light
Enhance visibility during intricate sequin work with a magnifying glass or a task light. This is particularly useful when dealing with smaller sequins or detailed patterns.
11. Pattern Template (Optional)
If you’re following a specific design, have a pattern template printed or drawn to guide your sequin placement accurately.
Gathering these materials beforehand will set the foundation for a successful sequin-sewing project, allowing you to focus on the creative process with confidence.
Choosing the Right Sequins
Selecting the perfect sequins is crucial for a successful embellishment. Consider factors like size, color, and material to complement your project.
Larger sequins make a bold statement, while smaller ones offer delicate detailing. Choose colors that harmonize or contrast for the desired effect.
Additionally, opt for sequins made of materials like plastic, metal, or fabric, depending on the project’s durability and aesthetic. Ultimately, the right sequins will enhance your creation and elevate its visual appeal.
Preparing Your Fabric
Preparing your fabric is a crucial step in ensuring a seamless and polished result when sewing on sequins.
Begin by selecting a fabric that complements your project; it should have the right weight and texture to support sequins without compromising its integrity.
Before sewing, make sure to pre-wash your fabric to prevent shrinkage later on. Create a clean and organized workspace, removing any potential obstructions that might hinder your sewing process.
Once your fabric is prepped and your workspace is ready, you’re set for a smooth sequin-sewing experience.
Selecting the Appropriate Needle and Thread
To ensure smooth and effective sequin sewing, choose a needle with a larger eye, suitable for handling sequins and preventing thread breakage.
Opt for a strong and durable thread that complements both the fabric and sequins.
The right needle and thread combination enhances stitching precision and contributes to the overall durability and professional finish of your sequin-adorned creation.
Marking the Design
Before you start sewing, it’s essential to plan and mark your design. Discover effective techniques for transferring your desired pattern onto the fabric, ensuring precision in every stitch.
Before you dive into sewing sequins onto your fabric, it’s crucial to mark your design thoughtfully.
This step ensures precision and helps you achieve the desired pattern with ease. Here’s a guide on how to effectively mark the design:
1. Fabric Markers or Chalk
Utilize fabric markers or chalk to sketch your sequin design directly onto the fabric. These tools offer visibility without leaving permanent marks, allowing you to make adjustments as needed.
2. Pattern Template
If you have a specific design in mind, use a pattern template as a reference.
Place the template on the fabric and trace the outline with a fabric marker or chalk. This method ensures accuracy, especially for intricate or repeating patterns.
3. Straight Edge or Ruler
For clean lines and geometric patterns, use a straight edge or ruler to guide your markings. This ensures that your sequins align precisely, creating a polished and professional appearance.
4. Measuring and Marking Points
Measure key points of your design and mark them on the fabric. This helps maintain symmetry and even spacing between sequins. Pay attention to the placement of focal points to achieve a balanced and visually appealing result.
5. Test on Scrap Fabric
Before marking your main fabric, test the design on a scrap piece. This allows you to refine your technique, ensuring that the sequin placement and spacing align with your vision.
6. Erasable Fabric Markers (Optional)
Consider using erasable fabric markers for intricate designs. These markers disappear with heat, providing a clean slate once your sequins are in place.
Always test the erasable marker on a small, inconspicuous area before widespread use.
7. Secure Fabric in Embroidery Hoop
If your fabric allows, secure it in an embroidery hoop while marking the design. This keeps the fabric taut, minimizing distortion and ensuring accurate marking.
8. Visualize the End Result
Take a moment to visualize the end result before marking. Consider how the sequins will catch the light and interact with the overall design. This visualization will guide your marking decisions for a stunning final product.
By carefully marking your design, you set the foundation for a successful sequin-sewing project. This thoughtful preparation ensures that your sequins are placed precisely, resulting in a visually appealing and well-executed creation.
Securing the First Sequin
Securing the first sequin sets the foundation for a flawless embellishment. Begin by anchoring the thread securely on the fabric’s underside, hiding the knot.
Bring the needle up through the fabric, string on the first sequin, and carefully guide it into place.
To secure it, gently bring the needle back down through the sequin and the fabric, ensuring it lays flat without puckering. Repeat this process, maintaining even spacing and alignment, for a stunning sequin arrangement.
Stitching Patterns and Styles
When it comes to stitching sequins onto fabric, various patterns and styles can create stunning effects. The choice of stitch depends on the desired outcome.
For a secure and straightforward attachment, use a simple running stitch. To minimize visible thread and emphasize the sequins, consider the invisible stitch, concealing the thread beneath the sequins.
If aiming for a decorative effect, experiment with stitches like the backstitch or blanket stitch, adding texture and dimension.
Beads and sequins can also be combined, using a combination of stitches to secure them in place. Each stitch style offers a unique look, so explore and find the one that best complements your project’s aesthetic.
Dealing with Burstiness: Managing Sequin Placement
Managing sequin placement is crucial in dealing with burstiness, the tendency for sequins to bunch together or create uneven spacing.
To tackle this, start by planning the layout beforehand, marking spots, or creating guidelines for placement. Use a thimble to push through fabric layers and maintain control over sequin spacing.
Sew sequins individually, ensuring each is securely attached without pulling or bunching nearby ones. Periodically step back and assess the arrangement to adjust spacing and maintain consistency.
Patience and meticulousness in placement will result in a stunning, evenly adorned surface without compromising on burstiness.
Troubleshooting Common Issues
Sewing on sequins can be a joyous experience, but like any creative endeavor, it comes with its share of challenges.
Here’s a guide to troubleshooting common issues and ensuring your sequin-sewing journey is as smooth as possible.
1. Sequins Falling Off
Problem: You’ve painstakingly sewn on your sequins, only to find them falling off shortly after.
Solution: Ensure you’re using a strong, durable thread. Double-threading the needle and knotting the end can provide extra security. Additionally, check your stitching technique; a tight and secure stitch is crucial to keeping sequins in place.
2. Uneven Sequin Spacing
Problem: Your sequins are spaced unevenly, creating a less-than-polished look.
Solution: Before sewing, mark your fabric with a light pencil or chalk to guide your sequin placement. Take your time and use this guide to maintain consistent spacing. If you notice irregularities, don’t hesitate to remove and reposition sequins as needed.
3. Difficulty Piercing Fabric
Problem: Your needle is struggling to pierce through the fabric, especially when dealing with thicker materials.
Solution: Opt for a needle with a larger eye and a strong shaft. Needles designed for heavy fabrics, like denim or upholstery, can make the process smoother. Consider a thimble to protect your fingers when dealing with resistant fabrics.
4. Sequins Getting Tangled
Problem: Sequins are getting tangled with each other during the sewing process.
Solution: Be mindful of the sequin orientation as you sew. Ensure they lie flat against the fabric, avoiding overlap that can lead to tangling. If tangling occurs, carefully untangle the sequins, securing them with additional stitches if necessary.
5. Creating Patterns Seamlessly
Problem: Difficulty in creating intricate patterns with sequins.
Solution: Plan your design meticulously before you start sewing. Use fabric markers or chalk to sketch the pattern directly onto the fabric. This will serve as a visual guide, making it easier to follow the design and maintain consistency.
6. Needle Breakage
Problem: Your needle keeps breaking, causing frustration and delays.
Solution: If you’re working with denser fabrics, ensure you’re using an appropriate needle for the job. Needles designed for heavy fabrics or sequin work are sturdier. Avoid excessive force and let the needle do the work; if it’s struggling, reassess your technique.
7. Maintaining Consistent Tension
Problem: Inconsistency in the tension of your stitches, leads to an uneven appearance.
Solution: Practice maintaining a steady hand and consistent tension as you sew. Experiment with different thread tensions on scrap fabric before starting your project. This will help you find the right balance for a professional finish.
By addressing these common issues, you’ll be better equipped to navigate the challenges of sewing on sequins, ensuring your creations shine with brilliance and craftsmanship.
Embellishing Accessories
Elevate the style of your accessories by strategically adding sequin embellishments. Whether it’s a handbag, scarf, or hat, a few well-placed sequins can transform everyday items into fashion statements.
Consider accentuating the edges of a scarf with a delicate sequin trim or adorning a handbag with a sequin pattern that complements your style.
The key is to strike a balance between sophistication and subtlety, ensuring that your accessories stand out without overpowering your overall look.
Experiment with different placement and patterns to find the perfect balance that enhances the charm of your favorite accessories.
Incorporating Sequins into Clothing Design
For those looking to make a bold fashion statement, we’ll delve into incorporating sequins into clothing design. From subtle accents to all-over sequin ensembles, the possibilities are endless.
Strategic Accents
Highlight specific areas of your clothing with sequin accents. Whether it’s the neckline, cuffs, or hem, the strategic placement of sequins adds a touch of glamour without overwhelming the entire garment.
Gradient Sequin Patterns
Create stunning visual effects by incorporating gradient sequin patterns. Transition from smaller to larger sequins or experiment with different colors to achieve a captivating ombre effect on your clothing.
Sequin Pockets and Trims
Elevate the elegance of your clothing by adding sequin trims to pockets or along seams. This subtle touch can make a simple garment chic and sophisticated.
Sequin Sleeves or Collars
Make a bold statement by focusing sequin embellishments on sleeves or collars. This technique draws attention to specific areas, enhancing the overall design of your clothing.
All-Over Sequin Ensemble
For those who love a dazzling look, consider creating an all-over sequin ensemble. Whether it’s a dress, jumpsuit, or jacket, covering the entire garment in sequins ensures a show-stopping, glamorous appearance.
Sequin Care and Maintenance
Maintaining the brilliance of sequined garments is crucial for their longevity. When caring for sequins, opt for gentle hand washing using a mild detergent. Turn the garment inside out to protect the sequins during washing.
Avoid machine washing and drying, as the agitation and heat can cause sequins to loosen or lose their luster. Store sequined items carefully, ensuring they are not crushed or folded to prevent damage.
Periodically inspect and secure any loose sequins to preserve the overall integrity of the garment. Following these simple steps will keep your sequined creations dazzling for years to come.
Showcasing Your Finished Creation
Once your sequin-sewn masterpiece is complete, it’s time to showcase it to the world. Capture the essence of your creation through high-quality photographs that highlight the intricate details and play of light on the sequins.
Consider creating a visually appealing display, whether on a mannequin or in a styled setting, to convey the garment’s intended aesthetic.
Share your creation on social media platforms and within creative communities to gather feedback and inspire others.
Remember, your finished creation tells a story, and how you present it contributes to the overall narrative of your craftsmanship.
People also ask
How do you attach sequins to fabric?
To attach sequins to the fabric, thread a needle with strong thread, knot the end, and bring the needle up from the fabric’s backside.
Slide a sequin onto the needle and secure it with a tight stitch. Repeat, ensuring sequins lie flat and are evenly spaced.
Knot the thread on the fabric’s back when finished for a secure and polished result.
What is the best stitch for sewing with sequins?
Opt for the “anchoring stitch” when sewing with sequins. This involves securing the sequin with a small stitch, ensuring it lays flat on the fabric.
This stitch provides stability and prevents sequins from flipping or tangling, resulting in a neat and professional look.
Can you sew sequins with a sewing machine?
Yes, you can sew sequins with a sewing machine using a zigzag stitch. Attach a sequin foot to prevent sequins from breaking needles.
Adjust stitch width to match sequin size, and carefully guide the fabric, allowing the machine to secure the sequins neatly and efficiently.
How do you sew scattered sequins?
For scattered sequins, employ a random stitch pattern. Thread a needle, secure the sequin with a small stitch, and move to the next spot.
Vary the spacing and orientation for a natural, scattered look. This technique ensures a dynamic and visually appealing distribution of sequins across the fabric.
Conclusion – How to Sew on Sequins?
In conclusion, sewing on sequins infuses any project with a touch of glamour and sophistication. By following the steps outlined in this guide, you’ve unlocked the art of attaching sequins securely and stylishly.
Remember, choosing the right materials, employing proper techniques, and allowing your creativity to shine are key to mastering this embellishment.
Whether you’re adding sparkle to garments, accessories, or crafts, sewing on sequins enhances your creations and lets your unique style dazzle.

Hi, I am Alice, and I am your perfect guide to the world of sewing machines. With over 10 years of experience in the sewing industry, I am passionate about sharing my knowledge and expertise to help you make the most of your sewing journey. about me