How to Sew Cape? Quick and Easy Guides In 2023
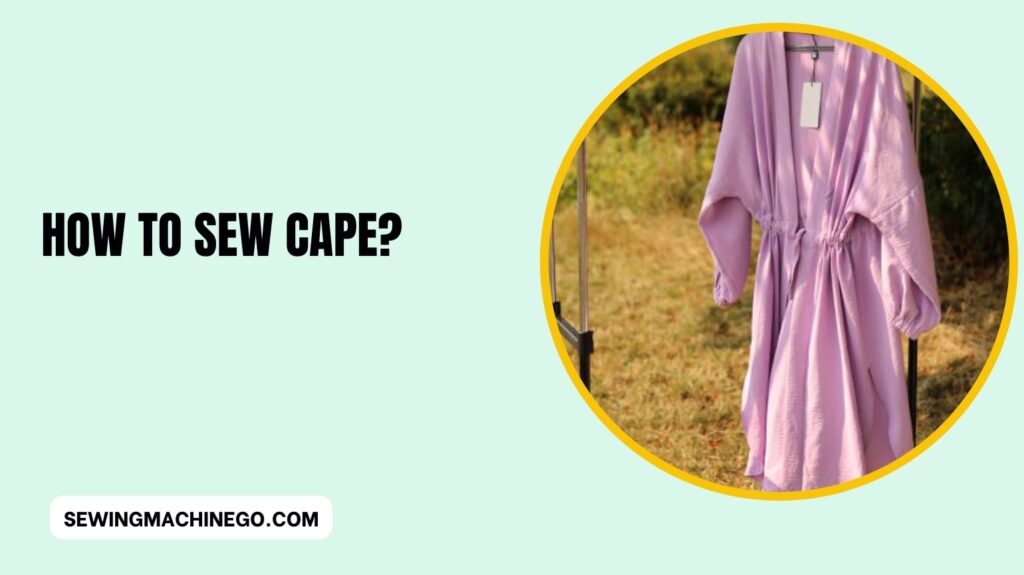
Sewing your own cape can be a rewarding and empowering experience. How to Sew Cape? From choosing the right fabric to adding unique embellishments, creating a custom cape allows you to express your style.
In this comprehensive guide, we’ll take you through each step of the process, ensuring that even beginners can confidently embark on this creative journey.

How to Sew Cape?
Capes have made a remarkable comeback in the world of fashion. Whether you’re inspired by medieval aesthetics or looking for a chic accessory to elevate your outfit,
learning how to sew a cape opens up a world of possibilities. This guide will equip you with the skills and knowledge needed to create a stunning cape that reflects your personal style.
Choosing the Right Fabric
The first step in sewing a cape is selecting the perfect fabric. Consider the season and occasion for which you’re creating the cape.
Lighter fabrics like chiffon work well for spring and summer, while heavier fabrics like wool are ideal for colder seasons.
Selecting a Pattern
A good pattern is the foundation of any successful sewing project. Choose a pattern that not only suits your style but also complements your body type. Whether you prefer a classic A-line or a dramatic cloak, there’s a pattern for every taste.
Gathering Necessary Supplies
Before diving into your sewing project, gather all the necessary supplies. From quality fabric to essential sewing tools, having everything on hand ensures a smooth and enjoyable sewing experience.
Understanding Measurements
Accurate measurements are key to a well-fitted cape. Take the time to measure yourself correctly, following the pattern’s guidelines. Precision at this stage will save you from adjustments later in the process.
Understanding measurements is crucial when sewing a cape to achieve the desired fit and style. Here’s a breakdown:
- Length: Measure from the base of the neck or shoulders to determine the desired length of the cape. Consider if you want a shorter cape that hits the waist or a longer one that reaches the knees or ankles.
- Width: Decide on the width of your cape, typically measured from wrist to wrist with arms outstretched. This measurement determines how much fabric you’ll need for a full and flowing cape.
- Neckline: Measure the circumference of your neck for a comfortable and proper-fitting neckline. This measurement determines the opening of the cape.
- Shoulder Width: Measure across your shoulders to ensure the cape’s shoulders fit comfortably without restricting movement.
- Hem and Seam Allowance: Consider the desired hem length and include seam allowances for stitching. The hemline could be straight or curved for different styles.
- Optional Features: If adding closures like buttons, hooks, or ties, measure the placements accurately for functional and aesthetic purposes.
Cutting the Fabric
When cutting fabric for a sewing project, precision is key. Use sharp fabric scissors or a rotary cutter on a flat surface to ensure clean, accurate cuts.
Align pattern pieces with the fabric’s grainline and consider the direction of any prints or patterns.
Take your time and double-check measurements before cutting to avoid errors that could affect the final fit and appearance of your project.
Pin and Sew the Pieces Together
Pinning and sewing fabric pieces together is a crucial step in bringing your project to life. Align the pieces with their right sides facing each other, using pins or clips to secure them in place.
Start sewing along the designated seam, keeping an eye on seam allowances and ensuring a straight, consistent stitch.
Take your time and remove pins as you sew to prevent damage to your machine. This process ensures a secure and precise construction for your sewing project.
Adding Embellishments
This is where your creativity can shine. Consider adding embellishments like lace, embroidery, or unique trims to enhance the visual appeal of your cape. Personalize it to make a truly one-of-a-kind piece.
Creating a Closure
Creating a closure for a cape can be done in various ways, depending on the style and functionality you prefer. Here’s a simple guide:
- Button Closure: Sew buttonholes along one edge of the cape and attach buttons on the opposite edge. Ensure they align properly for a snug fit when closed.
- Tie Closure: Add fabric ties or ribbons on either side of the neckline. These can be tied together in a bow or knot to secure the cape.
- Hook and Eye Closure: Sew small hooks on one edge and corresponding eyes on the other. This discreet closure is particularly effective for keeping the neckline closed.
- Velcro or Snap Fasteners: Attach strips of Velcro or sew snap fasteners for a quick and easy closure option.
- Clasp Closure: Use decorative clasps or closures for a stylish and secure fastening.
Before attaching the closure, consider the weight of the fabric and the desired aesthetic.
Ensure the closure method complements the cape’s design and provides the functionality you need. Sew the closures securely to withstand regular use without compromising the cape’s appearance.
Adding Finishing Touches
Adding finishing touches can elevate your sewing project to a professional level. Consider details like topstitching for a polished look, pressing seams for a crisp finish, and hand-sewing any remaining details for precision.
Embellishments like decorative trims, embroidery, or unique buttons can personalize your creation. Take the time to inspect for loose threads or uneven edges, ensuring a flawless final result that showcases your craftsmanship.
Common Sewing Mistakes and How to Avoid Them
Sewing a cape can be an exciting project, but it’s not without its challenges. Here are some common mistakes to watch out for and tips on how to avoid them:
- Uneven Seams:
- Mistake: Inconsistent seam allowances can lead to uneven seams.
- Solution: Take your time and measure seam allowances accurately. Use tools like a seam guide to maintain consistency.
- Misaligned Patterns:
- Mistake: Failing to align pattern pieces correctly can distort the overall design.
- Solution: Double-check pattern markings and use pins or fabric markers to ensure precise alignment before sewing.
- Tension Issues:
- Mistake: Uneven or too tight/loose stitching can impact the overall appearance.
- Solution: Test your machine’s tension settings on a scrap fabric before starting. Adjust as needed for smooth and even stitches.
- Ignoring Fabric Grain:
- Mistake: Sewing against the fabric grain can affect the drape and fit of the cape.
- Solution: Always follow the grainline indicated on the pattern. This ensures the fabric behaves as expected.
- Skipping Pressing:
- Mistake: Neglecting to press seams during and after sewing can result in a less polished finish.
- Solution: Invest time in pressing seams as you go. It makes a significant difference in the final appearance.
- Not Checking Machine Settings:
- Mistake: Overlooking stitch length or using the wrong needle for the fabric.
- Solution: Consult your machine’s manual for recommended settings. Adjust according to the fabric type.
- Rushing Through Cutting:
- Mistake: Hasty cutting can lead to inaccuracies and mismatched pieces.
- Solution: Take your time when cutting fabric. Ensure precise measurements and a steady hand.
- Ignoring Notches:
- Mistake: Neglecting to mark and match notches can affect the garment’s fit.
- Solution: Use tailor’s chalk or fabric markers to clearly mark notches. Match them diligently during assembly.
- Choosing the Wrong Thread:
- Mistake: Using the wrong thread can affect the strength and appearance of your stitches.
- Solution: Match the thread weight to your fabric. Consult the pattern or ask for advice at your local fabric store.
- Skipping a Test Run:
- Mistake: Starting without testing stitches on a scrap piece can lead to unforeseen issues.
- Solution: Always test your machine settings and stitches on a fabric scrap to ensure everything is working smoothly.
Customizing Capes for Different Styles
Once you’ve mastered the basics, don’t be afraid to experiment. Modify patterns, combine elements, and create unique styles that truly reflect your personality. Your cape is your canvas.
Customizing capes allows for versatile and personalized creations that suit various styles and preferences. There are several ways to adapt a cape pattern to achieve different looks:
- Length Variation: Adjust the length of the cape to create diverse styles. A shorter cape exudes a more casual or modern vibe, while a longer one adds drama and elegance.
- Neckline Designs: Experiment with different neckline shapes such as a classic round neck, a chic V-neck, or a sophisticated high collar to complement diverse aesthetics.
- Fabric Selection: Choose fabrics ranging from wool for a cozy winter cape to lighter materials like silk or chiffon for an elegant evening look. Play with textures, patterns, and colors for a unique touch.
- Embellishments and Details: Add personal flair by incorporating embellishments like buttons, lace, fringe, or embroidery. Pockets, belts, or caplet-style closures can also enhance the cape’s character.
- Silhouette Modifications: Tailor the silhouette by adjusting the width or tapering of the cape. Experiment with flared, A-line, or fitted styles to suit different body shapes and preferences.
By customizing these elements, you can transform a basic cape pattern into a versatile wardrobe piece that reflects your style and creativity.
Experimentation with these variations allows for a diverse range of capes suitable for various occasions and fashion sensibilities.
Caring for Handmade Capes
To ensure the longevity of your handmade creation, follow proper care instructions. Different fabrics require different care, so be sure to clean and store your cape accordingly.
Follow these tips:
- Gentle Washing: Handwash or use the delicate cycle with mild detergent. Avoid harsh chemicals or strong agitation that could damage delicate fabrics.
- Air Drying: Lay the cape flat to dry to maintain its shape and prevent stretching. Avoid wringing or twisting the fabric.
- Storage: Hang the cape on a padded hanger to prevent wrinkles. Avoid overcrowding in the closet to maintain its form.
- Spot Cleaning: Treat stains promptly with a gentle stain remover or spot-clean with a damp cloth. Test in an inconspicuous area first.
- Avoid Heat: Steer clear of high heat from irons or dryers, especially for delicate fabrics, to prevent damage or shrinkage.
Regular care and attention will keep your handmade cape looking beautiful and wearable for years to come.
Showcasing Your Creations
Showcasing your creations can be a fulfilling part of the creative process. Share your work on social media platforms, create an online portfolio or blog, or participate in craft fairs and local markets.
Don’t forget the power of word-of-mouth; wearing your creations in public can attract attention and inquiries. Encourage feedback and engage with your audience to build a community around your work.
The joy of sharing your handmade items lies in connecting with others who appreciate your craftsmanship and creativity.
People also ask
How much fabric do you need for a cape?
The amount of fabric needed for a cape depends on the style, size, and whether it has a hood.
As a general guideline, for a basic adult-sized cape without a hood, 2 to 3 yards (1.8 to 2.7 meters) of fabric may be sufficient.
However, it’s advisable to consult a specific sewing pattern or design to determine the accurate yardage based on your desired cape style and size.
How do you make a homemade cape?
To make a homemade cape:
Choose Fabric: Select a fabric of your choice, considering the desired length and style.
Cut Fabric: Cut the fabric into the desired shape, typically a rectangle or oval, based on your design.
Hem Edges: Hem the edges of the fabric to prevent fraying. Fold the edges inward and sew them down.
Add Closure: Attach a closure at the neck area, such as a button, hook and eye, or Velcro.
Optional: Embellish: Embellish the cape with decorations like appliques, trims, or contrasting fabric for personalization.
Try It On: Ensure the cape fits well and drapes as desired.
What fabric to line the cape with?
For lining a cape, consider using lightweight and smooth fabrics for comfort and ease of movement. Common choices include satin, silk, polyester lining, or even lightweight cotton.
The lining fabric should complement the outer fabric and provide a polished finish to the garment.
What is the difference between a cloak and a cape?
The main difference between a cloak and a cape is the design and usage. A cape is a shorter, sleeveless outer garment that drapes over the shoulders and fastens at the neck.
In contrast, a cloak is a longer, often full-length, loose-fitting garment that also lacks sleeves and is typically worn for warmth or as a fashion statement.
Cloaks generally cover more of the body, while capes are shorter and maybe more decorative than functional.
Conclusion
In conclusion, crafting a cape is more than creating a garment—it’s a journey of creativity and expression.
By following the steps outlined in this guide, you’ve ventured into the world of sewing a classic piece that exudes elegance and versatility.
Remember, attention to detail, precise stitching, and choosing the right fabrics are key to a stunning result.
Embrace your newfound skills and revel in the joy of wearing or gifting a handmade cape that reflects your unique style and craftsmanship.

Hi, I am Alice, and I am your perfect guide to the world of sewing machines. With over 10 years of experience in the sewing industry, I am passionate about sharing my knowledge and expertise to help you make the most of your sewing journey. about me


