How to Sew Pockets on Pants? Step By Step Guides In 2023
How to Sew Pockets on Pants? Adding pockets to pants can be both practical and stylish, transforming a simple garment into a functional piece of clothing.
Whether you’re looking to enhance the utility of your pants or customize them to suit your needs, sewing pockets is a valuable skill.
In this guide, we’ll explore the steps and techniques required to skillfully sew pockets onto pants.
From selecting the right fabric to understanding placement and sewing methods, mastering this process opens up a world of possibilities for personalizing and upgrading your wardrobe

How to Sew Pockets on Pants?
Have you ever found the perfect pair of pants but wished they had better pockets? What if you could customize your trousers to have pockets that meet your specific needs and preferences?
This guide will empower you to do just that. Let’s dive into the world of DIY pocket sewing.
Materials Needed
Before we embark on our pocket-sewing journey, let’s gather the necessary materials.
You’ll need fabric, a sewing machine, scissors, pins, and a measuring tape. These tools are the building blocks of your pocket-sewing adventure.
Choosing the Right Fabric
The fabric you choose for your pockets is crucial. It should complement the pants and be sturdy enough to withstand daily use.
Consider the weight and color of the fabric, ensuring it blends seamlessly with your chosen pants.
Measuring and Marking
Precision is key when it comes to pocket placement. Use a measuring tape to determine the ideal location for your pockets. Marking accurately ensures your pockets are not only stylish but also functional.
Cutting the Fabric
Once you’ve marked your measurements, it’s time to cut the fabric. Pay close attention to ensure clean and precise cuts. Accuracy at this stage contributes to the overall quality of your sewn pockets.
Preparing the Pockets
Before attaching the pockets, take the time to fold and iron the edges neatly. Proper preparation sets the foundation for pockets that not only look good but also stand the test of time.
Attaching the Pockets
Now, the exciting part – sewing the pockets onto your pants. Follow our step-by-step guide for a seamless attachment process. Ensure your stitches are secure to guarantee the longevity of your DIY pockets.
Adding Embellishments (Optional)
If you’re feeling adventurous, consider adding embellishments to your pockets. Be cautious not to compromise functionality for style. Your pockets should still serve their primary purpose effectively.
Troubleshooting Common Issues
Sewing pockets onto pants is a creative and rewarding endeavor, but like any DIY project, you might encounter a few bumps along the way.
Fear not! Here’s a troubleshooting guide to address common issues and keep your pocket-sewing journey smooth:
Uneven Stitching
Issue: Your stitches are uneven, leading to an untidy finish.
Solution: Ensure proper tension on your sewing machine. Test on a scrap piece of fabric before sewing the actual pockets. Additionally, maintain a consistent speed while sewing.
Puckered Fabric
Issue: The fabric around the pocket area is puckered, creating a wrinkled appearance.
Solution: Check your machine’s tension and adjust it accordingly. Ensure the fabric is flat and smooth while sewing, and consider using a walking foot for even fabric feeding.
Misaligned Pockets
Issue: Your pockets are not perfectly aligned, giving an asymmetrical look.
Solution: Double-check your measurements and markings before cutting and sewing. Take your time during the preparation phase to ensure accurate alignment.
Difficulty Turning Corners
Issue: Turning corners while sewing proves challenging, resulting in jagged edges.
Solution: Use a smaller stitch length when approaching corners. Pivot the fabric slowly to achieve sharp turns. Practice on scrap fabric before attempting the actual pocket.
Thread Tension Issues
Issue: Thread tension problems can lead to loose or tight stitches.
Solution: Adjust the tension according to your machine’s specifications. Ensure the thread is properly threaded through the machine, including the bobbin.
Fabric Fraying
Issue: The edges of your pockets or fabric are fraying.
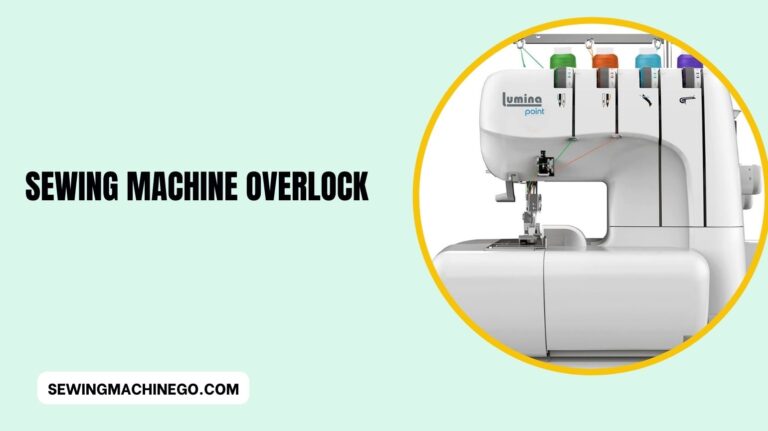
Solution: Consider using a serger or overlocking stitch on your machine to prevent fraying. Alternatively, apply a fray-check solution to the edges after cutting.
Needle Breakage
Issue: Your needle keeps breaking while sewing.
Solution: Ensure you are using the correct needle for the fabric type. Replace the needle if it’s dull or bent. Check for any obstructions in the bobbin area that might be causing resistance.
Difficulty Sewing Thick Fabrics
Issue: Sewing pockets on thick fabrics is proving to be challenging.
Solution: Use a heavy-duty needle suitable for thick fabrics. Consider hand-cranking the machine through thick areas to maintain control.
Mismatched Thread Color
Issue: Your thread color doesn’t match the fabric, making stitches more visible.
Solution: Choose a thread color that closely matches the fabric. If in doubt, opt for a slightly darker shade, as it tends to blend better.
Skipped Stitches
Issue: Your machine occasionally skips stitches, compromising the integrity of the seam.
Solution: Ensure you’re using the correct needle size and type for the fabric. Clean the machine regularly and change the needle if it’s damaged.
Final Touches
As you near the completion of your pocket-sewing project, pay attention to the final touches. These details will elevate the overall appearance and functionality of your newly sewn pockets.
Benefits of DIY Pocket Sewing
DIY pocket sewing offers a myriad of benefits beyond just adding functionality to garments. Firstly, it empowers personalization, allowing you to customize pockets to suit your specific needs and style preferences.
Secondly, it’s cost-effective, enabling you to upgrade existing clothing or create new pieces without breaking the bank.
Additionally, DIY pocket sewing fosters creativity and a sense of accomplishment, as you transform basic garments into unique, tailored items.
It also enhances sewing skills, providing opportunities to learn different techniques and improve craftsmanship. Ultimately, DIY pocket sewing not only serves practical purposes but also fuels creativity and individuality in your wardrobe.
Sewing Pockets for Different Types of Pants
Sewing pockets for various types of pants involves considering their style, purpose, and placement. Here’s a breakdown:
- Jeans or Denim Pants:
- Front Pockets: For jeans, you might sew traditional five-pocket style pockets. These are usually made with durable denim fabric and can vary in size and shape based on the jeans’ design.
- Back Pockets: These pockets often have decorative stitching and are placed on the backside of the pants, providing both functionality and style.
- Dress Pants or Trousers:
- Slant Pockets: Common in dress pants, these pockets are sewn at an angle and provide a sleeker, more formal look.
- Welt Pockets: Another elegant option for dressier pants, welt pockets have a flap or no flap and are often found on the back.
- Cargo Pants or Utility Pants:
- Large Patch Pockets: Cargo pants frequently feature large, boxy pockets on the thighs, perfect for storage and a more casual aesthetic.
- Side or Hidden Pockets: Utility pants might have various hidden or zippered pockets, offering functionality without compromising style.
- Athletic Pants or Joggers:
- Zippered Pockets: Often seen in athletic wear, zippered pockets are secure and practical, keeping items safe during physical activities.
- Patch Pockets: Sometimes found on joggers, patch pockets can be sewn for a more relaxed look, allowing for easy access to essentials.
When sewing pockets for different types of pants, consider the fabric weight, the pants’ purpose, and the wearer’s comfort.
Additionally, ensure proper measurements and precise stitching to guarantee the pockets are both functional and aesthetically pleasing.
Community and Sharing
Join a community of like-minded individuals who share your passion for DIY fashion. Share your pocket-sewing journey and learn from others who have embarked on similar adventures.
Maintaining Sewn Pockets
Maintaining sewn pockets is key to ensuring their longevity and functionality. Regular care involves avoiding overloading the pockets with excessive weight to prevent strain on the seams.
When laundering, be mindful to empty pockets and close any zippers or fastenings to prevent items from getting caught or causing damage during the washing process.
Additionally, gentle washing and air drying or using a delicate cycle can help preserve the integrity of the pocket stitching.
Periodically checking for loose threads or minor repairs can also prevent small issues from escalating into larger problems, ensuring your sewn pockets remain durable and functional over time.
People also ask
How do you sew pockets on pants by hand?
To sew pockets on pants by hand:
Prepare Fabric: Cut pocket pieces from the fabric, ensuring they match the pattern and size specifications.
Fold and Pin: Fold and press the pocket edges that will be attached to the pants. Pin the pockets in place on the pants, aligning the edges.
Hand Baste: Hand baste (temporary long stitches) the pocket in place to secure it before permanent stitching.
Sew: Use a backstitch or slip stitch to sew the pocket onto the pants, ensuring even and secure stitches.
Secure Corners: Reinforce the pocket corners with extra stitches for durability.
Repeat: Repeat the process for the other pocket.
Optional: Topstitch (If Desired): For a polished look, you can topstitch around the pocket edges after attaching them.
What is the best stitch for sewing pockets?
The best stitch for sewing pockets is typically the backstitch or slipstitch. The backstitch is strong and durable, ideal for securing pocket edges to fabric.
The slipstitch, on the other hand, is more discreet and is often used for attaching pocket linings or securing folded edges.
Choose the stitch based on your preference, the fabric type, and the level of visibility you desire for your pocket seams.
How do you sew back pockets on pants?
To sew back pockets on pants:
Cut Pocket Pieces: Cut two identical pocket pieces from your fabric.
Fold and Press: Fold and press the edges of the pockets that will be attached to the pants.
Pin in Place: Pin the pockets onto the back of the pants, ensuring they are symmetrical and properly positioned.
Hand Baste: Hand-baste the pockets in place with long temporary stitches.
Sew: Use a backstitch or slipstitch to permanently sew the pocket onto the pants. Reinforce stress points like corners.
Optional: Topstitch (If Desired): For a finished look, you can topstitch around the pocket edges.
Repeat for Other Pocket: Repeat the process for the other back pocket.
How do you sew pockets into side seams?
To sew pockets into side seams:
Cut Pocket Pieces: Cut pocket pieces (usually rectangles) from your fabric.
Attach Front and Back Panels: Sew the front and back panels of the pants together, leaving the side seams open where the pockets will go.
Fold and Press Pocket Edges: Fold and press the edges of the pocket openings on the side seams.
Position and Pin: Position the pocket pieces over the side seam openings, aligning edges. Pin in place.
Sew Pockets: Sew the pocket pieces to the side seams, securing them in place.
Complete Side Seams: Continue sewing down the side seams, enclosing the pockets as you go.
Optional: Topstitch (If Desired): For a professional finish, you can topstitch along the pocket edges.
Conclusion
In conclusion, sewing pockets onto pants is a rewarding endeavor that combines functionality with creativity.
Armed with the knowledge from this guide, you can confidently take on the challenge and enjoy the satisfaction of wearing pants with pockets crafted by your own hands.

Hi, I am Alice, and I am your perfect guide to the world of sewing machines. With over 10 years of experience in the sewing industry, I am passionate about sharing my knowledge and expertise to help you make the most of your sewing journey. about me