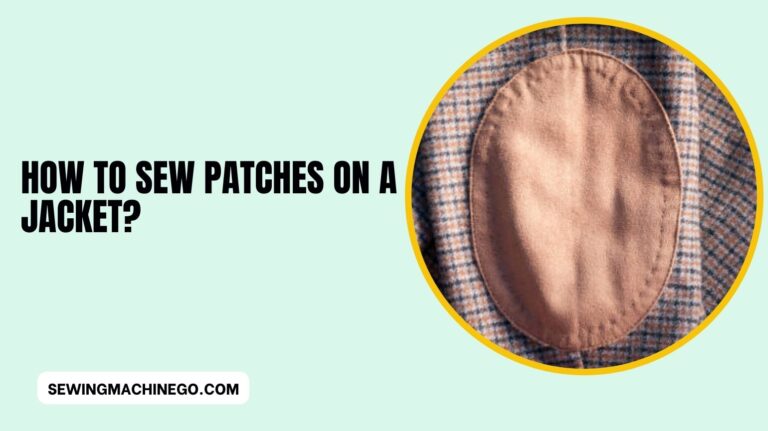
How to Sew on a Patch by Hand? (Ultimate Guide) In 2023
Sewing on a patch by hand is an artful and practical skill that allows you to add personality and character to your clothing or accessories. How to Sew on a Patch by Hand?
Whether you’re mending a beloved garment, embellishing a piece for style, or simply aiming to personalize your items, the process of hand-sewing patches brings a unique touch to your wardrobe.
In this guide, we’ll navigate through the step-by-step process, exploring the techniques and tips that will empower you to skillfully attach patches by hand.
So, gather your materials, thread your needle, and let’s embark on this creative journey of enhancing your items through the timeless craft of hand-sewn patchwork.
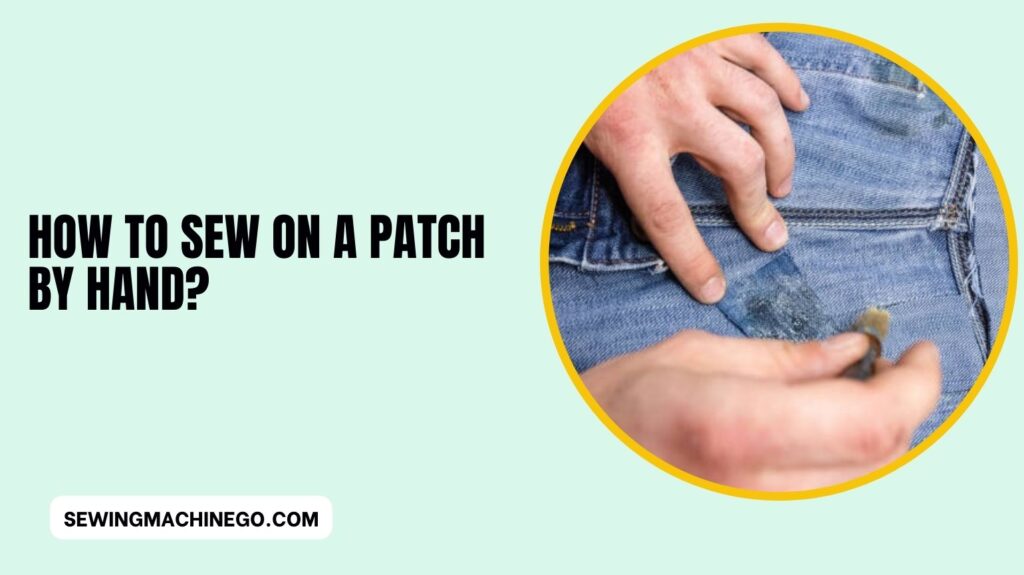
How to Sew on a Patch by Hand?
In a fast-paced world, the act of hand-sewing patches has become a lost art. However, the value it adds to your garments is unparalleled.
Each stitch is a testament to your time, effort, and personal touch. In this guide, we’ll explore the intricacies of hand-sewing patches and how they can transform your clothes into personalized masterpieces.
Gathering Materials
Before diving into the world of hand-sewing, it’s essential to gather the right materials.
Quality patches, a suitable fabric, and the right tools are key to a successful outcome. Consider the theme and purpose of the patch to ensure a seamless integration with the garment.
Preparing the Fabric
The foundation of any successful sewing project is the fabric. Choosing the right material and preparing it adequately can make a significant difference in the final result.
Ensure your fabric is clean, ironed, and ready for the hand-sewing process.
Selecting the Patch
Patches come in various shapes, sizes, and designs. From classic embroidered patches to modern iron-on options, the choices are vast. Select a patch that resonates with the garment’s style and your personal taste.
Tools of the Trade
Equipping yourself with the right tools is crucial for a smooth hand-sewing experience. Needles, thread, thimbles, and scissors are among the essentials.
Proper care and maintenance of these tools ensure longevity and efficiency in your hand-sewing journey.
Step-by-Step Guide
Let’s dive into the practical aspect of hand-sewing patches. Follow these step-by-step instructions to achieve a professional-looking result.
From threading the needle to securing the patch, we’ll cover each detail to make your hand-sewing experience enjoyable and successful.
Threading the Needle
Begin by selecting a thread color that complements the patch and fabric. Carefully thread the needle, ensuring a secure knot at the end.
Placement of the Patch
Decide on the patch’s placement and use pins to secure it in position. Take your time to ensure the patch aligns perfectly with the garment.
Starting the Stitch
Commence stitching from the inside of the garment to hide the knot. Use small, even stitches to secure the patch to the fabric.
Securing the Edges
Focus on the patch’s edges, ensuring they are securely attached. Consistent stitches contribute to a polished and professional appearance.
Finalizing the Stitch
Complete the process by tying a secure knot on the inside of the garment. Trim any excess thread for a neat finish.
Adding Personal Flair
Sewing patches by hand provides an opportunity to unleash your creativity. Experiment with additional embellishments, embroidery, or unique stitching patterns to add a personal flair to your creations.
Troubleshooting
Hand-sewing patches can be a rewarding experience, but like any craft, it comes with its share of challenges. Here are some common issues you might encounter and practical tips to troubleshoot them:
1. Uneven Stitches
Issue: Your stitches are inconsistent, creating an uneven appearance.
Solution: Practice makes perfect. Take your time and focus on creating uniform stitches. Use a ruler or grid to guide your needle for even spacing.
2. Fabric Puckering
Issue: The fabric around the patch appears puckered or wrinkled.
Solution: Ensure your fabric is well-prepared by ironing it before sewing. Choose an appropriate needle size for the fabric, and maintain consistent tension while stitching to prevent puckering.
3. Knots and Tangles
Issue: Constant knots or tangles in your thread disrupt the sewing process.
Solution: Keep your thread at a manageable length to avoid tangling. Use beeswax to coat the thread, preventing knots. If a knot forms, gently untangle it rather than pulling forcefully.
4. Patch Misalignment
Issue: The patch is not aligned correctly, resulting in an awkward appearance.
Solution: Before securing the patch with stitches, double-check its placement using pins. Adjust as needed to ensure proper alignment before starting the stitching process.
5. Difficulty Threading the Needle
Issue: Threading the needle proves challenging, especially with finer threads.
Solution: Wet the tip of the thread to stiffen it, making it easier to thread through the needle’s eye. Ensure good lighting to see clearly, and if needed, use a needle threader.
6. Thread Breakage
Issue: The thread keeps breaking during the sewing process.
Solution: Check the quality of your thread; weaker threads are prone to breakage. Use a sturdy, high-quality thread suitable for the fabric. Additionally, avoid excessive tension while sewing.
7. Inconsistent Stitch Length
Issue: Your stitches vary in length, affecting the overall appearance.
Solution: Maintain a steady rhythm while sewing to achieve consistent stitch length. Practice controlled hand movements to improve stitch uniformity.
8. Difficulty Knotting the Thread
Issue: Creating a secure knot at the end of your thread is challenging.
Solution: Wrap the thread around the needle multiple times before pulling it through to create a secure knot. Experiment with different knotting techniques until you find one that works best for you.
Benefits of Hand-Sewing
Hand-sewing offers a multitude of benefits that go beyond merely stitching fabrics together. Some of these advantages include:
- Precision and Control: Hand-sewing allows for meticulous control over every stitch, enabling finer detailing and intricate work that might be challenging with a machine.
- Versatility: It’s a versatile skill applicable in various situations, from repairs and alterations to creating unique, handmade items.
- Portability: With minimal equipment required, hand-sewing can be done almost anywhere, making it a portable craft that doesn’t rely on electricity or large workspaces.
- Connection to Tradition: Embracing hand-sewing connects you to traditional craftsmanship, preserving heritage and allowing for a deeper appreciation of the artistry involved.
- Mindfulness and Relaxation: Many find hand-sewing to be a calming and meditative activity, offering a chance to unwind, destress, and be present in the moment.
- Personalization: Hand-sewing allows for a personal touch, enabling individuals to express their creativity and individuality through unique stitches and designs.
- Detail-Oriented: It caters to the meticulous; you can easily control the pace, ensuring every stitch meets your standards and the project’s specific requirements.
- Accessibility: It’s a skill that’s accessible to beginners and experts alike, fostering a sense of accomplishment and continuous improvement.
Sustainability in Sewing
Sustainability in sewing is an approach that encompasses various practices to minimize environmental impact and promote ethical, long-lasting creations. Some key elements of sustainable sewing include:
- Material Selection: Opting for sustainable fabrics like organic cotton, linen, hemp, or repurposed materials reduces the ecological footprint. Choosing high-quality, durable fabrics ensures longevity.
- Waste Reduction: Efficient pattern layout minimizes fabric waste. Repurposing old garments or fabrics and recycling scraps for smaller projects reduces overall waste.
- Mindful Consumption: Buying only what’s needed and using existing supplies before purchasing new ones reduces unnecessary consumption and waste.
- Ethical Labor Practices: Supporting ethical brands or ensuring fair wages and safe working conditions if outsourcing production promotes social responsibility.
- Upcycling and Repurposing: Breathing new life into old garments by upcycling or repurposing them into new creations extends their lifespan and minimizes textile waste.
- Repair and Maintenance: Mending and maintaining clothing prolongs its usability, reducing the need for frequent replacements.
- Conservation of Resources: Using energy-efficient sewing machines, water-saving techniques, and eco-friendly notions like biodegradable thread contributes to resource conservation.
- Education and Awareness: Sharing knowledge about sustainable sewing practices promotes consciousness and inspires others to adopt eco-friendly habits.
By embracing sustainable sewing practices, individuals contribute to reducing the environmental impact of the fashion and textile industry while creating beautiful, conscientious pieces.
Showcasing Your Work
Your hand-sewn creations deserve to be showcased. Whether on social media or in your daily life, explore creative ways to display and share your unique pieces with the world.
Learning from Others
Connect with a community of like-minded individuals who share a passion for hand-sewing. Draw inspiration from their stories and experiences, fostering a sense of camaraderie in the world of sewing.
People also ask
What is the best stitch for hand sewing patches?
The best stitch for hand-sewing patches is the whipstitch.
This simple yet effective stitch involves passing the needle over the edge of the patch and through the fabric, creating a secure and neat seam.
It’s versatile, works well for various patch sizes and shapes, and provides a professional finish.
The whipstitch is easy to master, making it an ideal choice for both beginners and experienced crafters.
How do you sew a patch without a sewing machine?
To sew a patch without a sewing machine:
Gather Materials: Collect a needle, thread, patch, and fabric.
Prepare Fabric: Clean and iron the fabric for smooth stitching.
Thread the Needle: Choose a thread color that matches the patch.
Pin the Patch: Secure the patch in position with pins.
Start Stitching: Use a whipstitch, starting from the inside of the garment.
Secure Edges: Focus on stitching the patch’s edges securely.
Finalize Stitch: Tie a knot on the inside for a neat finish.
Add Personal Touch: Consider creative touches like embroidery or unique stitches for personal flair.
What needle do you use for hand sewing patches?
For hand-sewing patches, opt for a sharp or embroidery needle. These needles have a pointed tip, making it easier to navigate through fabric and patches.
Choose a needle size suitable for your fabric, ensuring it effortlessly passes through both the patch and garment, facilitating smooth and precise stitches.
How do you securely sew on a patch?
To securely sew on a patch:
Use the Right Stitch: Employ a whipstitch for a secure and neat seam.
Double Thread: Thread your needle with a double strand for added strength.
Tie a Secure Knot: Begin with a tight knot to anchor the thread securely.
Even Stitches: Maintain even and tight stitches to ensure a strong attachment.
Focus on Edges: Pay extra attention to stitching around the patch’s edges for stability.
Final Knot: Tie a secure knot on the inside of the garment to finish the stitching process.
Conclusion
In Conclusion, Hand-sewing patches are more than a practical skill; it’s an art form that allows you to infuse your garments with personality and style.
The intentional process of hand-sewing brings a sense of connection and creativity to your wardrobe.
Embrace the slow and deliberate approach, and watch as your hand-sewn patches transform your clothes into unique works of art.

Hi, I am Alice, and I am your perfect guide to the world of sewing machines. With over 10 years of experience in the sewing industry, I am passionate about sharing my knowledge and expertise to help you make the most of your sewing journey. about me