How to Sew on Velcro? Easy Steps Guide In 2024
Velcro has revolutionized the way we fasten things together, offering a convenient and adaptable closure system. Whether it’s for clothing,
accessories, or various DIY projects, knowing how to sew on Velcro properly is a handy skill.
In this comprehensive guide, we’ll delve into the essentials of sewing with Velcro, providing step-by-step instructions and valuable tips for a successful attachment.
Introduction to Sewing with Velcro
Sewing on Velcro may seem daunting, but with the right tools and techniques, it’s an accessible skill for beginners and seasoned sewers alike.
Velcro, based on a hook-and-loop closure mechanism, comprises two components: the hook side and the loop side, which adhere together when pressed and can be easily pulled apart.
Understanding Velcro: Types and Varieties
Velcro, based on a hook-and-loop closure mechanism, comes in various types catering to different needs. The fundamental types include sew-on, adhesive-backed, and iron-on varieties.
Sew-on Velcro is commonly used for fabric-based projects due to its durability and flexibility.
Adhesive-backed Velcro offers convenience for quick fixes, while iron-on Velcro adheres using heat, ideal for certain fabrics. Each type serves distinct purposes, providing users with options suited to their specific projects.
Essential Tools and Materials
To begin sewing on Velcro, gather the necessary materials: fabric, Velcro strips, scissors, pins, a sewing machine (or needle and thread), and an iron if using iron-on Velcro.
Preparing the fabric by pre-washing and cutting it into the desired shapes for Velcro attachment is essential for a neat finish.
To successfully work with Velcro, gather essential tools and materials:
- Fabric: Choose the fabric suitable for your project.
- Velcro Strips: Opt for the type (sew-on, adhesive-backed, or iron-on) that aligns with your project’s needs.
- Scissors: Use sharp scissors for cutting fabric and Velcro strips.
- Pins: Essential for holding fabric pieces together before sewing.
- Sewing Machine or Needle and Thread: Depending on preference, use a sewing machine for efficiency or needle and thread for more intricate work.
- Iron (if using iron-on Velcro): Needed for applying heat-activated Velcro.
Having these tools and materials at hand ensures a smooth and efficient process when working with Velcro for your projects.
Preparing the Fabric and Velcro
Properly preparing the fabric and Velcro is crucial for a successful attachment. Pre-wash and dry the fabric to prevent shrinkage after sewing.
Cut Velcro strips to fit the fabric pieces, ensuring they match in size and shape for accurate alignment during sewing.
Sewing Techniques with Velcro
There are two primary methods for sewing Velcro: hand-sewing and using a sewing machine.
Hand-sewing allows for more control and precision, especially for delicate fabrics, while using a sewing machine provides a quicker and more uniform attachment.
Sewing Velcro onto fabric involves two primary techniques:
- Hand-Sewing Velcro:
- Prepare the Needle and Thread: Choose a strong thread that matches the fabric and a needle suitable for heavy-duty sewing.
- Align the Velcro: Position the Velcro strips on the fabric as desired, ensuring proper alignment.
- Secure with Stitches: Use a running stitch or backstitch along the edges of the Velcro, ensuring a secure attachment. Stitch through both the fabric and Velcro for durability.
- Finish Neatly: Knot the thread securely and trim any excess to achieve a clean finish.
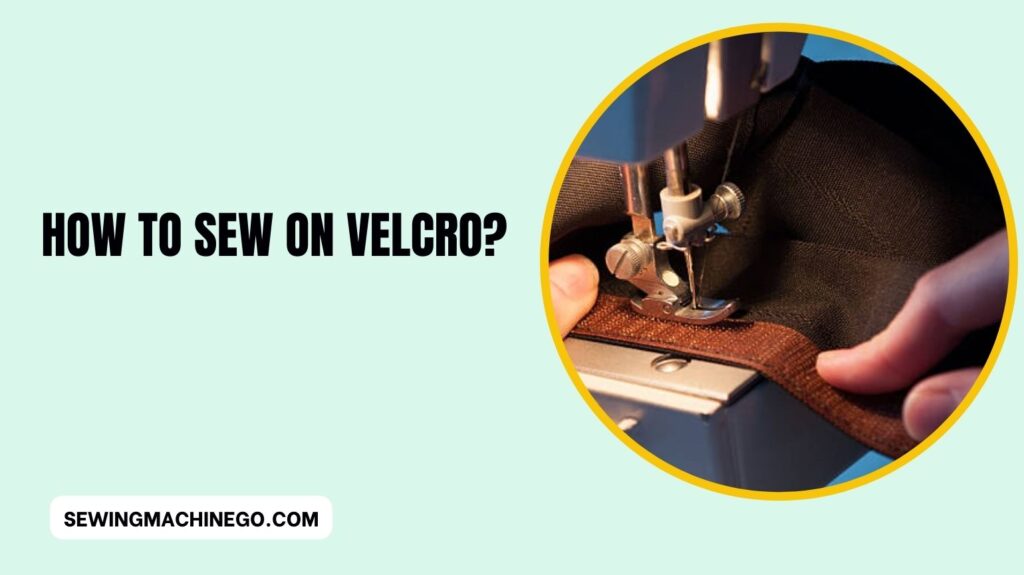
- Using a Sewing Machine:
- Prepare the Machine: Set up your sewing machine with a heavy-duty needle and thread.
- Position and Secure: Place the fabric with Velcro strips under the machine’s presser foot, aligning it properly.
- Stitching: Use a straight stitch or zigzag stitch along the edges of the Velcro, ensuring to sew through both the fabric and Velcro for a strong bond.
- Backstitch at the End: Reinforce the stitches at the beginning and end to secure the attachment.
Selecting the appropriate technique depends on the fabric type, project complexity, and personal preference. Hand-sewing offers precision, especially for delicate fabrics, while a sewing machine provides speed and uniformity.
Experiment with both to find the method that suits your project best.
Tips for Sewing Success
Choosing the right needle and thread for sewing Velcro is important. Opt for a heavy-duty needle to penetrate the Velcro without breaking and use a strong thread that matches the fabric.
Securing the edges of the Velcro with extra stitching ensures longevity. For successful Velcro sewing:
- Needle and Thread: Choose a heavy-duty needle and strong thread for durability.
- Edge Reinforcement: Stitch around the edges of Velcro for added strength.
- Proper Alignment: Ensure precise alignment for a neat finish.
- Machine Settings: Adjust machine tension for smooth sewing.
- Test and Adjust: Test stitches on scrap fabric before sewing onto the main project for adjustments.
These tips enhance durability, precision, and overall quality when sewing Velcro onto fabric.
Finishing Touches
Once the Velcro is sewn onto the fabric, trim any excess threads for a clean look. Test the strength of the attachment by firmly pressing the Velcro together and pulling it apart multiple times to ensure it holds securely.
Practical Applications of Sewn Velcro
Learning how to sew on Velcro opens up numerous possibilities. Use it for repairing clothing, attaching patches, creating closures for bags, or crafting interactive DIY projects like wallets, pouches, and organizers.
Troubleshooting Common Issues
Encountering issues like Velcro not sticking properly or sewing mishaps are common.
Understanding how to troubleshoot these problems, such as cleaning the Velcro or re-stitching if necessary, ensures a successful outcome.
When encountering Velcro sewing issues:
- Poor Adhesion: Clean Velcro surfaces for better grip.
- Misalignment: Carefully reposition and resew if needed.
- Puckering Fabric: Use stabilizers or adjust tension for smoother sewing.
- Weak Stitches: Opt for stronger threads or adjust machine settings.
- Uneven Attachment: Ensure consistent pressure while sewing.
Addressing these common problems ensures a smoother Velcro sewing process and a better outcome for your projects.
People also ask
What is the best stitch for sewing Velcro?
For sewing Velcro, a straight stitch or a zigzag stitch works best.
A straight stitch offers simplicity and strength, while a zigzag stitch provides added durability,
especially on fabrics that require flexibility. Adjust the stitch length and width based on the project’s needs for a secure attachment.
Do you need a special needle to sew Velcro?
Yes, it’s advisable to use a heavy-duty or denim needle when sewing Velcro.
These needles are designed to penetrate through the Velcro material without breaking, ensuring smoother sewing and preventing needle damage.
How do I attach Velcro to the fabric?
To attach Velcro to fabric:
Prepare the Fabric: Ensure the fabric is clean and dry.
Cut Velcro Strips: Trim Velcro to the desired size.
Position: Place Velcro on fabric, ensuring proper alignment.
Sew or Iron-On: Sew using a machine or hand-sew, or apply heat if using iron-on Velcro.
Secure Edges: Stitch around edges for durability if sewing.
Choose the appropriate method based on the Velcro type and project requirements for a secure attachment.
How do you sew on Velcro by hand?
To sew Velcro by hand:
Prepare Needle and Thread: Use a strong thread and a suitable needle.
Position Velcro: Align Velcro on fabric as desired.
Stitch Edges: Use a running stitch or backstitch around Velcro edges, sewing through both fabric and Velcro.
Secure and Finish: Knot the thread securely and trim the excess for a clean finish.
Hand-sewing allows precision and control for attaching Velcro securely to fabric.
Conclusion – How to Sew on Velcro?
In conclusion, sewing on Velcro is a straightforward process that can add convenience and functionality to various projects.
By following the steps outlined and using the right tools and techniques, anyone can master the art of attaching Velcro securely and neatly.
Whether for clothing, crafts, or household items, sewing on Velcro provides a versatile solution for closures, fastenings, and organizational needs.
With practice, patience, and attention to detail, you can easily incorporate Velcro into your sewing projects, enhancing their utility and ease of use.

Hi, I am Alice, and I am your perfect guide to the world of sewing machines. With over 10 years of experience in the sewing industry, I am passionate about sharing my knowledge and expertise to help you make the most of your sewing journey. about me