How to Sew Kimono? Step by Step Easy Guide In 2023
Sewing a kimono is not just about crafting a garment; it’s a journey into the rich tapestry of tradition and self-expression.
How to Sew Kimono? In this comprehensive guide, we’ll take you through the intricate yet rewarding process of creating your own kimono.
From choosing the right fabric to adding personal touches, let’s unravel the art of sewing a kimono step by step.
How to Sew Kimono?
To sew a kimono, start by selecting your desired fabric and pattern. Cut the fabric according to the pattern’s instructions, then sew the main body pieces together. Attach the sleeves and finish the edges.
Add any desired embellishments or closures. Finally, press and hem the kimono for a polished look. Enjoy your handmade kimono! and Here are the Deatailed Explain.
Getting Started with Sewing
Before we dive into the stitches and patterns, let’s gather our tools. A sturdy sewing machine, quality fabric, and sharp scissors are your best companions. Choose a fabric that drapes well, like silk or cotton, for that authentic kimono feel.
Understanding Kimono Patterns
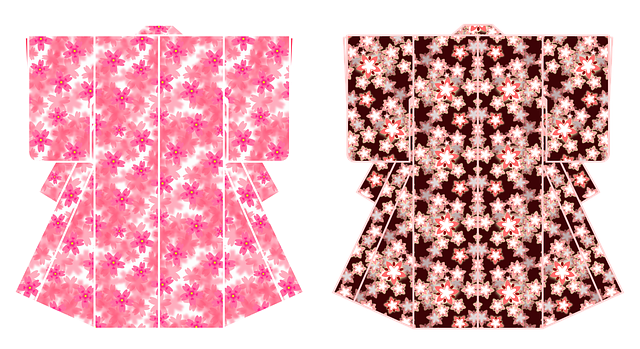
Kimono patterns come in various styles, from the classic Uchikake to the casual Yukata. Selecting the right pattern is crucial, ensuring your finished kimono aligns with your personal style and the occasion you have in mind.
Cutting and Preparing the Fabric
Precision is key when it comes to cutting the fabric. Measure twice, cut once, they say. Don’t forget to pre-wash your fabric to prevent any unexpected shrinkage after your masterpiece is complete.
Sewing Techniques for Beginners

Embarking on your kimono-sewing journey as a beginner? Fear not! Here’s a quick rundown of essential sewing techniques to get you started:
1. Threading the Needle
The first step is threading your needle. Hold the thread’s end, pass it through the needle’s eye, and create a knot at the other end. It might take a few tries, but practice makes perfect.
2. Straight Stitches
The bread and butter of sewing! To create a straight stitch, place the fabric under the presser foot, lower it, and start sewing. Keep a steady pace and guide the fabric evenly for a neat result.
3. Backstitch
Prevent unraveling by mastering the backstitch. After sewing a few stitches forward, reverse the machine to reinforce the seam. It’s a simple yet crucial technique.
4. Cutting Fabric Accurately
Measure twice, and cut once. Use fabric scissors for precise cuts, and always follow your pattern’s guidelines. Accuracy at this stage ensures your kimono pieces fit seamlessly.
5. Pre-Washing Fabric
Avoid unwanted surprises by pre-washing your fabric. This prevents shrinkage after your kimono is complete. Follow the fabric care instructions to maintain its quality.
These basic sewing techniques lay the foundation for your kimono-making adventure. Practice each step, and soon you’ll be stitching like a pro!
Adding Traditional Elements
While a kimono is a statement piece on its own, consider adding traditional elements like an obi belt or hand-painted motifs. This is where your creativity can truly shine.
Troubleshooting Common Issues
Sewing mishaps are part of the journey. Discover quick fixes for common issues, ensuring your kimono-making experience remains enjoyable and stress-free. Sewing your own kimono can be a joyous experience, but it’s not without its challenges.
Here’s a quick guide to troubleshoot common issues and ensure your sewing journey remains smooth:
Thread Tension Troubles
Uneven stitches or loops on your fabric? Adjust the thread tension. Experiment with your machine’s tension settings until you achieve a balanced, uniform stitch.
Needle Nightmares
Broken or bent needles can be frustrating. Ensure you’re using the right needle for your fabric type, and replace needles regularly. A dull needle can cause fabric snags and uneven stitches.
Bobbin Blues
Inconsistent stitches may be due to issues with the bobbin. Check for proper threading and ensure the bobbin is correctly inserted. Clean any lint or debris that may be affecting its performance.
Uneven Seams
If your seams are puckering or not lying flat, it might be a sign of incorrect fabric feed. Ensure your machine’s feed dogs are engaged and pulling the fabric evenly as you sew.
Pattern Puzzle
Struggling with pattern alignment? Take the time to mark your fabric accurately and double-check your measurements. Precision in cutting and pinning helps avoid misalignment issues.
Sticky Situations with Zippers
Are zippers refusing to cooperate? Apply a small amount of wax or a zipper lubricant to make the process smoother. Take your time, and ensure the zipper is properly aligned before stitching.
Finishing Touches
As you near the completion of your kimono, attention to detail is crucial. Learn how to add the final touches, giving your creation that polished, professional look.
As you near the completion of your kimono, these finishing touches add the perfect polish to your masterpiece:
Pressing Matters
Give your kimono a professional look by pressing your seams. Use a steam iron and press cloth to avoid damaging delicate fabrics. Pressing sets the stitches and ensures a crisp finish.
Hemming Perfection
Achieve a clean hem by folding the fabric twice and securing it with pins. Stitch along the edge for a polished look. Ensure the hem is even and follows the garment’s design.
Embellishments with Precision
If you’ve chosen to add embellishments, do so with care. Hand-sew decorative elements like beads or embroidery for a personal touch. Ensure they are securely attached for durability.
Fray-Free Edges
Prevent fraying by finishing the edges of your fabric. Use a zigzag stitch, pinking shears, or bias binding to secure the edges and add a professional touch to your kimono.
Final Inspection
Before declaring your kimono complete, conduct a thorough inspection. Check for loose threads, ensure all seams are secure, and confirm that buttons or closures are firmly attached.
This attention to detail ensures a polished, finished garment. These simple yet crucial finishing touches elevate your kimono from a handmade creation to a professionally crafted piece.
Enjoy the satisfaction of seeing your hard work come to fruition!
Caring for Your Handmade Kimono
Congratulations, you’ve completed your masterpiece! Now, learn how to care for your kimono to ensure it remains a cherished part of your wardrobe for years to come.
Showcasing Your Creation
Whether you wear it proudly or display it as a work of art, your handmade kimono deserves to be showcased. Share your creation on social media or with fellow enthusiasts.
Inspiration from Expert Seamstresses
Gain insights from those who have mastered the art of kimono sewing. Their stories and tips will inspire and guide you on your creative journey.
Kimono Sewing Communities
Joining a community of like-minded individuals can enhance your kimono-making experience. Share ideas, seek advice, and celebrate each other’s successes in dedicated online forums.
Advancing Your Skills
For those ready for a challenge, explore advanced kimono patterns and resources to further hone your sewing skills. The journey doesn’t end here; it evolves.
Celebrating Cultural Diversity
The kimono is not just a garment; it’s a celebration of cultural diversity. Explore the different styles and variations, appreciating the beauty of this traditional attire.
People also ask
How much fabric do I need for a kimono?
The amount of fabric needed for a kimono depends on factors such as your body size, the desired length of the kimono, and whether it has long or short sleeves.
On average, you may need 4 to 5 yards (3.7 to 4.6 meters) of fabric for a basic adult-sized kimono.
However, it’s advisable to consult a pattern or specific project instructions for precise measurements based on your design and size preferences.
Can you sew a kimono?
Sewing a kimono involves cutting fabric based on a pattern, sewing the main body, attaching sleeves, and finishing with hems.
Use a kimono sewing pattern for guidance, and follow step-by-step instructions. Pay attention to fabric choice, as traditional kimonos often use silk or lightweight cotton.
Basic sewing skills, such as straight stitching and hemming, are essential. Practice precision for clean lines, and you’ll have your own handmade kimono!
What kind of fabric is used for kimonos?
Traditional kimonos are often made from silk, which provides a luxurious and smooth texture.
However, other fabrics like cotton, linen, and synthetic materials are also used for more casual or modern interpretations of kimonos. The choice of fabric depends on the desired style, comfort, and occasion.
How is a traditional kimono made?
A traditional kimono is crafted through a meticulous process. First, a pattern is created based on the individual’s measurements.
The fabric, often silk, is then cut into specific pieces according to the pattern. These pieces are meticulously sewn together using straight stitches.
The sleeves are attached, and the garment is assembled. The finishing touches involve hand-sewn hems and the addition of a collar.
Traditional kimonos are often adorned with intricate designs, and the entire process requires skilled craftsmanship and attention to detail.
Conclusion
In conclusion, sewing a kimono is a rewarding and creative endeavor that allows you to showcase your skills and express your personal style.
By following the steps outlined in this guide, you can successfully create a beautiful and unique kimono. Remember to pay attention to details, choose high-quality fabrics, and take your time to ensure a polished final product.
With practice and dedication, you’ll master the art of sewing kimonos, opening the door to endless possibilities for self-expression and fashion customization. Happy sewing!

Hi, I am Alice, and I am your perfect guide to the world of sewing machines. With over 10 years of experience in the sewing industry, I am passionate about sharing my knowledge and expertise to help you make the most of your sewing journey. about me