How to Sewing Shirt? (Step-by-Step Guide) of 2023
Sewing your own shirt can be a rewarding and creative endeavor. How to Sewing Shirt? It allows you to customize your wardrobe, choose the perfect fabric, and have a garment that fits you like a glove.
In this article, we will guide you through the process of sewing a shirt, from selecting the right materials to adding those finishing touches.
How to Sewing Shirt?
Sewing a shirt from scratch may seem like a daunting task, especially if you’re new to sewing. However, with the right guidance and some patience, you can create a beautiful, custom-made shirt that fits you perfectly.
In this step-by-step guide, we’ll walk you through the process of sewing a shirt, from gathering supplies to adding your personal touch. Let’s get started!
Getting Started with Sewing
If you’re new to sewing, it’s essential to familiarize yourself with your sewing machine. Read the manual and practice on scrap fabric to gain confidence.
Gathering Your Supplies
To get started, you’ll need a sewing machine, thread, scissors, pins, and a fabric marker. Ensure you have a variety of sewing machine needles suitable for different fabrics.
Choosing the Right Fabric
The fabric you choose can make or break your shirt. Consider the style and purpose of the shirt and select a fabric that suits your needs.
Taking Accurate Measurements
Taking accurate measurements is a crucial step in sewing a well-fitting shirt. To ensure your handmade creation fits perfectly, measure your body’s key areas, including the chest, waist, hips, and sleeve length.
Use a flexible measuring tape, maintain proper posture, and double-check your measurements for precision. Accurate measurements lay the foundation for a shirt that not only looks great but feels comfortable too.
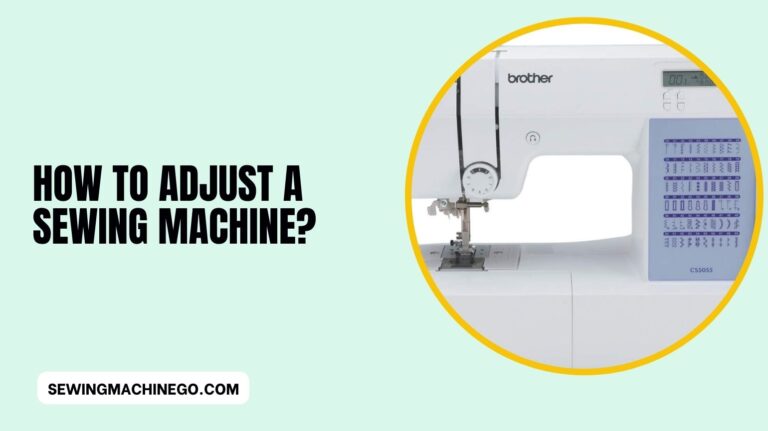
Preparing Your Sewing Machine
Preparing your sewing machine is a crucial step in sewing a shirt. Before you start, ensure that your machine is clean and well-maintained.
Thread it with the appropriate color thread, select the right needle, and set the desired stitch length and width. Test your stitches on a scrap piece of fabric to confirm the settings are correct.
Additionally, make sure your bobbin is wound with matching thread and inserted correctly. Properly preparing your sewing machine ensures a smooth and frustration-free sewing experience, resulting in a well-crafted shirt.
Cutting the Fabric
Lay out your fabric and pattern pieces, pin them in place, and carefully cut along the lines. Be precise to ensure even seams.
Sewing the Shirt: Step by Step
Here are the Sewing the Shirt: Step by Step:
Sewing the Seams
Start by sewing the side seams, followed by the shoulder seams. Ensure you backstitch at the beginning and end of each seam.
Attaching Sleeves
Pin the sleeves to the armholes and sew them in place. Make sure the sleeves are symmetrical.
Adding Collar and Cuffs
Attach the collar and cuffs to your shirt. Take your time to ensure they are correctly aligned and secure.
Sewing Buttons and Buttonholes
Create buttonholes on one side and sew buttons on the other. This step requires precision to ensure your shirt closes properly.
Final Touches: Pressing and Hemming
Final touches like pressing and hemming are essential to giving your handmade shirt a polished look. Pressing with an iron eliminates wrinkles, ensuring a professional finish.
Hemming, whether with a machine or by hand, not only secures edges but also adds a clean, neat appearance to your shirt.
These simple steps can make a significant difference in the overall quality of your garment, making it look as if it came straight from a boutique.
Troubleshooting Common Issues
Learn how to fix common sewing problems like thread tension issues, broken needles, and fabric puckering. Here are some common sewing issues and troubleshooting tips:
- Thread Tension Problems: If your stitches are too loose or too tight, adjust the thread tension dial on your sewing machine. Test on scrap fabric until you achieve the desired tension.
- Broken Needles: Frequent needle breakage can be caused by using the wrong needle type or sewing over pins. Ensure you’re using the right needle and remove pins before sewing.
- Fabric Puckering: If your fabric is bunching or puckering, it could be due to incorrect tension, a dull needle, or using the wrong stitch. Adjust the tension, replace the needle, and use the appropriate stitch for the fabric.
- Skipped Stitches: Skipped stitches can result from a bent needle or a dull one. Replace the needle and ensure it’s correctly inserted.
- Thread Snapping: If your thread keeps breaking, check for thread jams in the bobbin area or use a good-quality thread. Also, make sure you’re not pulling the fabric too hard while sewing.
- Uneven Stitching: Uneven stitching may be caused by inconsistent pressure on the foot pedal. Maintain a steady, controlled pressure for even stitches.
- Fabric Jamming: If fabric gets stuck in the machine, remove it carefully and rethread the machine. Ensure the feed dogs are up and the machine is properly threaded.
- Bird’s Nest (Thread Bunching Underneath): Thread bunching under the fabric is often due to incorrect threading or bobbin issues. Re-thread the machine, wind a new bobbin, and insert it correctly.
- Machine Making Unusual Noises: Unusual noises can indicate a foreign object or thread caught in the machine’s mechanics. Turn off the machine, remove the thread, and check for obstructions.
- Uneven Seam Allowances: To maintain consistent seam allowances, use guides on your machine, like the seam guide or foot edge, or mark the seam allowance on the fabric with a washable marker.
Finishing Touches: Embellishments
Adding embellishments to your handmade shirt can make it truly unique and reflect your personal style. Here are some creative ideas for finishing touches:
- Embroidery: Embroidery is a beautiful way to embellish your shirt. You can add intricate designs, monograms, or decorative motifs. Use embroidery floss or thread that complements your fabric.
- Appliqué: Appliqué involves attaching pieces of fabric onto your shirt to create patterns or pictures. It’s a fantastic way to add a pop of color or texture to your design.
- Fabric Paint: Fabric paint comes in various colors and types. You can use it to hand-paint designs, patterns, or even abstract art on your shirt. Make sure to follow the paint’s drying and setting instructions.
- Beadwork: Sewing beads onto your shirt can add a touch of glamour and elegance. You can create intricate bead patterns or use them to highlight certain areas, such as the neckline or cuffs.
- Lace and Trim: Adding lace or decorative trim to your shirt can give it a delicate, vintage, or bohemian look. You can attach lace to the collar, and cuffs, or even as an insert on the front or back.
- Sequin Embellishments: Sequins can add sparkle and glamour to your shirt. You can sew them individually or in patterns to create eye-catching effects.
- Patches: Iron-on or sew-on patches can be a fun way to add character to your shirt. They come in various designs, from cute and quirky to vintage and retro.
- Ribbon and Bows: Sewing ribbons or bows as embellishments can give your shirt a playful and feminine touch. You can add them around the neckline, on the sleeves, or at the waist.
- Fringe: Fringe can create a trendy, boho-inspired look. Sew it along the hem or cuffs of your shirt for a unique and textured finish.
- Contrasting Fabric Panels: Incorporating contrasting fabric panels can create an interesting visual effect. Consider using a different fabric for pockets, cuffs, or a front panel.
- Hand-Embroidered Monograms: Personalize your shirt by hand-embroidering your initials or a meaningful symbol. This adds a personal and bespoke touch to your creation.
- Rhinestones and Studs: If you want some bling, rhinestones, and studs can be a great choice. They can be used to create patterns or simply to accentuate specific areas.
Caring for Your Handmade Shirt
To care for your handmade shirt, always follow the care labels for washing instructions, separating colors, and using a gentle cycle.
Turn the shirt inside out to protect the fabric and any embellishments. Opt for a mild detergent, skip fabric softeners, and lay the shirt flat to air dry.
Iron at low to medium heat, using a pressing cloth if needed. Store it in a cool, dry place, mend any minor issues promptly, and rotate your wardrobe to reduce wear.
For delicate shirts, consider professional dry cleaning. With these practices, your handmade shirt will maintain its quality and craftsmanship for years to come.
People also ask
Can a beginner sew a shirt?
Yes, a beginner can sew a shirt. With the right guidance, patience, and practice, sewing a shirt is an achievable project for someone new to sewing.
How hard is it to hand sew a shirt?
Hand sewing a shirt can be challenging, especially for beginners. It requires patience and precision.
While it’s doable, it may take more time and effort compared to using a sewing machine.
What is the best stitch for sewing shirts?
The best stitch for sewing shirts is a straight stitch, as it provides a clean and secure seam. A straight stitch is ideal for connecting fabric pieces and creating the main seams of a shirt.
Do you need a sewing machine to make a shirt?
No, you don’t need a sewing machine to make a shirt. While a machine can make the process faster, you can sew a shirt by hand, though it may take more time and patience.
Conclusion
In conclusion, sewing your own shirt is a creative and fulfilling endeavor that allows you to craft a garment tailored to your preferences.
From selecting the right fabric to mastering the art of embellishments, this journey offers endless possibilities for personal expression.
By following the steps outlined in this guide and taking care of your handmade shirt, you can enjoy a wardrobe piece that not only reflects your style but also showcases your sewing skills.
So, dive into the world of sewing, embrace the learning process, and wear your unique creations with pride. Happy sewing!

Hi, I am Alice, and I am your perfect guide to the world of sewing machines. With over 10 years of experience in the sewing industry, I am passionate about sharing my knowledge and expertise to help you make the most of your sewing journey. about me