How to Sew Pleats? Easy Takes Guide In 2024
Mastering the art of sewing pleats opens a realm of possibilities for creating beautifully textured garments and decorative fabric designs.
Whether you’re a novice or a seasoned seamstress, understanding how to sew pleats adds a sophisticated touch to clothing, home decor, or crafts.
These elegant folds not only elevate the aesthetic appeal but also offer structural benefits, adding dimension and flair to your creations.
Joining fabric in precise folds may seem intricate, but with the right technique and guidance, you’ll soon discover the artistry and ease behind sewing perfect pleats.
Introduction to Sewing Pleats
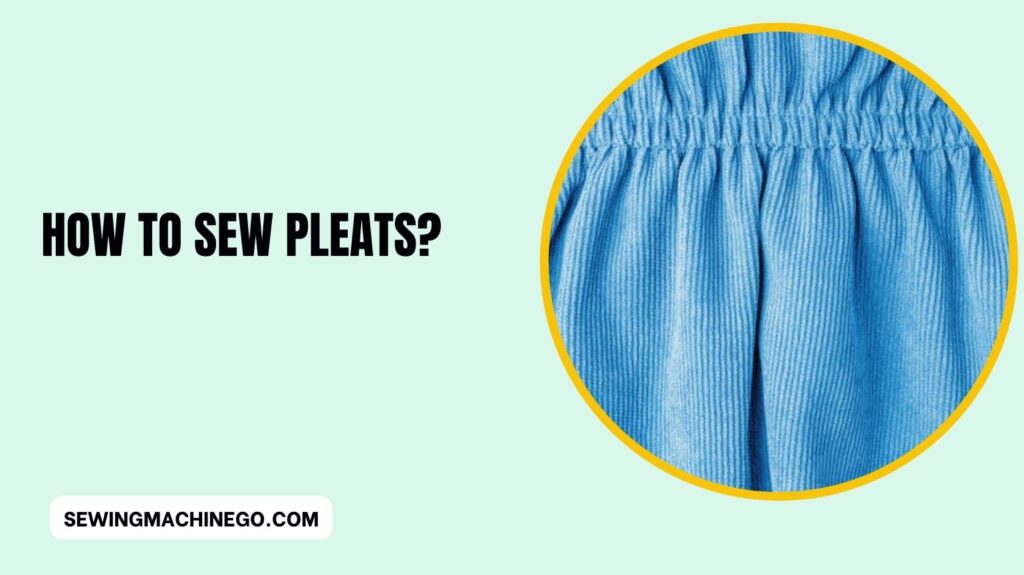
Understanding pleats is crucial before diving into the sewing process. Pleats refer to folds in fabric that create a structured look while allowing flexibility and movement.
Sewing pleats is a fundamental skill in dressmaking, enabling the creation of beautiful designs.
Types of Pleats
There are various types of pleats, each offering a distinct look. Knife pleats are sharp and narrow, while box pleats are wider and more structured.
Accordion pleats provide a flowing effect, and inverted pleats are tucked folds often used in skirts and dresses.
Materials and Tools Required
Before starting, gather suitable fabrics like cotton, polyester, or silk, along with a sewing machine or needle and thread. Other essential tools include fabric markers, pins, and an iron for crisp pleats.
Preparing Fabric for Pleats
Before creating pleats, ensuring the fabric is ready is crucial. Start by ironing the material to remove any wrinkles. Use a fabric-specific setting and press carefully, ensuring a smooth surface.
For heavier fabrics, consider using starch to add stiffness, aiding in pleat formation.
Additionally, marking the fabric with the tailor’s chalk or pins helps guide the pleat placement accurately. Proper preparation ensures precise, polished pleats for your project.
Sewing Techniques for Pleats
When sewing pleats, use appropriate stitching methods such as basting or topstitching. Ensure the pleats are secured in place while maintaining consistency in their size and direction.
Sewing pleats involves precision and attention to detail to create clean, structured folds in the fabric. Here are some key sewing techniques for different types of pleats:
1. Marking and Measuring:
- Accurate Markings: Begin by marking the fabric with precise measurements and guidelines for the pleats using fabric chalk or a tailor’s pencil.
- Spacing: Determine the spacing between pleats based on the desired width and style of the pleat.
2. Folding Techniques:
- Knife Pleats: Fold the fabric back and forth, creating narrow, overlapping pleats in one direction.
- Box Pleats: Fold the fabric to form two equal-sized pleats facing away from each other, creating a box-like appearance.
- Accordion Pleats: Alternate between mountain and valley folds, creating a series of peaks and troughs.
- Inverted Pleats: Tuck the fabric inwards to create folded layers, often used in skirts or dresses.
3. Securing Pleats:
- Pinning: Use straight pins to secure the pleats in place along the marked guidelines before sewing. Pinning ensures the pleats stay aligned during the sewing process.
- Basting: Consider basting the pleats with a long stitch length to temporarily secure them before permanent stitching.
4. Stitching Methods:
- Topstitching: Sew close to the edge of the pleats to secure them permanently. This method helps maintain the pleats’ crispness and structure.
- Machine Stitching: Use a sewing machine with a suitable needle and thread for the fabric. Stitch along the marked lines or edges of the pleats, ensuring even and straight stitches.
5. Direction and Consistency:
- Consistent Folding: Maintain consistency in the direction and size of the pleats throughout the sewing process for a uniform appearance.
- Pressing: After sewing, press the pleats carefully with an iron on low heat, using a pressing cloth to set the folds and remove any wrinkles.
6. Experimentation and Practice:
- Practice Scrap Fabric: Before working on the actual garment, practice different pleating techniques on scrap fabric to perfect the folds and stitching.
7. Seam Finishing:
- Finish Seams: Depending on the fabric, consider finishing the raw edges of the fabric within the pleats to prevent fraying and ensure durability.
8. Customization:
- Pleat Direction: Experiment with the direction and angle of pleats to achieve different visual effects and textures in your designs.
Troubleshooting Common Issues
Encountering issues like uneven pleats or fabric slipping are common. Learn how to rectify these problems by adjusting the fabric or employing specific sewing techniques.
Creative Ways to Use Pleats
Pleats aren’t limited to clothing; explore using them in various creative projects like pillow covers, curtains, or even lampshades for a unique touch.
Tips for Maintaining Pleated Garments
Proper care ensures the longevity of pleated garments. Follow specific cleaning instructions and avoid ironing directly on pleats to retain their crispness.
Maintaining pleated garments requires care and attention to preserve their structure and elegance. Here are some essential tips to ensure your pleats stay crisp and beautiful:
1. Handwashing or Gentle Machine Wash:
- Handwashing: If possible, handwash pleated garments using mild detergent and lukewarm water. Gently agitate the fabric without wringing or rubbing the pleats.
- Machine Wash: Use a gentle cycle and a mesh laundry bag to protect the pleats from getting tangled or flattened. Wash similar fabrics together to avoid friction.
2. Avoid Direct Ironing:
- Ironing directly on pleats can flatten or distort them. Instead, place a thin cloth or use a press cloth over the pleats before ironing to protect and maintain their shape.
3. Drying Techniques:
- Air-drying is preferable for pleated items. Lay them flat on a towel, shaping the pleats as they dry to retain their structure.
- Avoid wringing or twisting the fabric as this can misshape the pleats.
4. Storage:
- Store pleated garments hanging or folded carefully to avoid crushing the pleats. Hanging them can help maintain their shape while folding should be done gently to prevent creasing.
5. Steaming:
- Use a handheld steamer to refresh pleats if they become slightly flattened. Steam from a distance to avoid direct contact with the pleats.
6. Professional Care:
- For intricate or delicate pleated items, consider professional dry cleaning or pressing services to ensure proper care without risking damage to the pleats.
7. Handling and Wearing:
- Be mindful when wearing pleated garments. Avoid activities that might cause excessive stretching or pulling of the fabric, which can affect the pleats.
- When handling or storing, support the weight of the garment evenly to prevent the pleats from becoming misshapen.
8. Regular Inspections:
- Periodically inspect pleated garments for any signs of damage or unraveled stitching. Promptly mend any loose threads or minor damages to prevent further issues.
9. Follow Care Instructions:
- Always refer to the care label instructions specific to the fabric and garment. Different materials may require unique care methods.
By following these maintenance tips, you can extend the lifespan of your pleated garments and keep them looking as stunning as the day you made or bought them.
People also ask
How do you sew pleats step by step?
Here’s a concise step-by-step guide to sewing pleats:
Mark and Measure: Use fabric chalk to mark the fabric with precise measurements and guidelines for the pleats, determining their width and spacing.
Fold the Fabric: Fold the fabric along the marked lines, following the specific technique for the type of pleat desired (knife, box, accordion, inverted).
Secure with Pins: Use straight pins to secure the pleats along the marked guidelines, ensuring they stay aligned and in place during sewing.
Baste or Temporarily Stitch: Consider basting the pleats with a long stitch length or use temporary stitches to hold them in position before permanent stitching.
Stitch Along Edges: Sew along the marked lines or edges of the pleats using a sewing machine or needle and thread, ensuring straight and even stitches.
Press the Pleats: After sewing, carefully press the pleats with an iron on low heat, using a pressing cloth to set the folds and remove any wrinkles.
Experiment and Practice: Practice different pleating techniques on scrap fabric to perfect the folds and stitching before working on the actual garment.
Finish Seams (optional): Depending on the fabric, consider finishing the raw edges within the pleats to prevent fraying and ensure durability.
How do you pleat fabric with a sewing machine?
Pleating fabric with a sewing machine involves using the machine’s settings or additional tools to create uniform folds:
Adjust Machine Settings: Some sewing machines have pleating settings or attachments that create pre-defined pleats while stitching.
Use a Pleating Foot or Attachment: Attach a specialized pleating foot or accessory to the machine, which helps in automatically creating pleats as the fabric feeds through.
Mark Guidelines: Mark the fabric with guidelines for pleat width and spacing, guiding the fabric as it feeds through the machine.
Stitch and Feed Fabric: Align the fabric according to the marked guidelines and sew while guiding the fabric through the pleating foot or attachment. The machine will automatically form pleats as it stitches.
Experiment and Adjust: Test the pleating settings or attachments on scrap fabric to ensure the desired pleat size and alignment before working on the actual garment.
Using a sewing machine for pleating can expedite the process and create evenly spaced and consistent pleats with relative ease.
How do you keep pleats in place when sewing?
To keep pleats in place when sewing:
Pin or Baste: Use straight pins or basting stitches to secure the pleats in position along the marked guidelines before permanent stitching. This prevents them from shifting or unfolding during sewing.
Press with Care: After securing the pleats, press them gently with an iron on low heat using a pressing cloth. This helps set the folds and ensures they stay in place while sewing.
How do you make pleats permanent?
To make pleats permanent:
Stitching: Sew along the folded edges of the pleats using a sewing machine or hand stitching. This permanently secures the pleats in place, ensuring they maintain their shape and structure.
Pressing: After stitching, press the pleats with an iron on low heat using a pressing cloth. This sets the stitches and reinforces the folds, making the pleats more durable and long-lasting.
Conclusion – How to Sew Pleats?
Mastering the art of sewing pleats requires patience and practice. By understanding the various pleating techniques and following precise steps,
you can create elegant and professional-looking pleats. Experiment with different fabrics and styles to hone your skills further.
With dedication and attention to detail, sewing pleats will become a satisfying addition to your sewing repertoire, allowing you to craft beautiful garments with intricate detailing.

Hi, I am Alice, and I am your perfect guide to the world of sewing machines. With over 10 years of experience in the sewing industry, I am passionate about sharing my knowledge and expertise to help you make the most of your sewing journey. about me