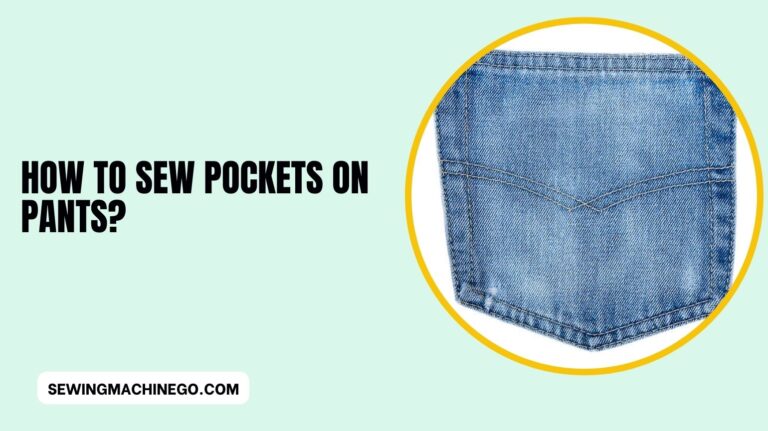
How to Sew Vinyl? (Know Some Important Steps) In 2023
Embarking on sewing projects with vinyl fabric introduces a unique set of challenges and considerations.
How to Sew Vinyl? From selecting the right tools to mastering techniques that accommodate this material’s characteristics, sewing with vinyl requires precision and a different approach than typical fabrics.
Understanding the nuances involved is key to achieving successful and durable results in your projects.
How to Sew Vinyl?
When sewing vinyl, use a heavy-duty needle, polyester or nylon thread, and clips instead of pins.
Adjust stitch length and tension on scrap pieces, and sew slowly to ensure precise seams. Practice will improve your skill in handling vinyl materials.
Introduction to Sewing Vinyl
Vinyl fabric, known for its water-resistant and sturdy nature, requires specialized handling during sewing. Understanding its properties is crucial for successful outcomes.
Despite its benefits, sewing vinyl poses challenges due to its thickness and slick surface.
Essential Tools and Materials
Selecting the right tools and materials is pivotal for a smooth sewing experience. Choosing a suitable sewing machine equipped to handle thicker fabrics is a primary consideration.
Additionally, opting for specialized needles, heavyweight thread, and clips instead of pins assists in avoiding damage to the material.
Preparing for Sewing
Prior preparation is key to achieving impeccable results when sewing vinyl. Preparing the fabric by using clips instead of pins prevents puncturing, ensuring the integrity of the material. Adjusting the sewing machine settings, such as using a longer stitch length, helps in navigating the vinyl’s density.
Techniques for Sewing Vinyl
Handling vinyl fabric requires finesse. Guiding the material smoothly through the machine and using a walking foot or Teflon presser foot aids in preventing sticking or dragging.
Mastering techniques for sewing straight seams and curves is essential for precise and neat stitching.
Sewing with vinyl requires a unique approach due to its distinct characteristics. Mastering these techniques ensures clean, professional-looking results.
1. Handling the Material
Vinyl is slick and can stick to the sewing machine’s surface. To prevent this, place tissue paper or a layer of clear adhesive tape on the bottom of the fabric. This helps the material glide smoothly through the machine without sticking.
2. Needle Selection
Opt for a heavy-duty needle specifically designed for sewing through thicker fabrics like vinyl. A size 90/14 or 100/16 needle works well, preventing skipped stitches and fabric damage.
3. Thread and Tension
Use a heavyweight thread suitable for vinyl sewing. Adjust the tension on your machine to accommodate the thicker thread and fabric, ensuring balanced stitches without puckering.
4. Machine Settings
Set your sewing machine to a longer stitch length, typically around 3.5 to 4 mm. This prevents the vinyl from perforating excessively, maintaining its integrity.
5. Walking Foot or Teflon Foot
Attach a walking foot or a Teflon foot to your machine. These specialized presser feet prevent the material from sticking or dragging, ensuring smoother stitching.
6. Positioning and Handling
When sewing, guide the vinyl fabric gently without pulling or stretching it. Use clips instead of pins to avoid leaving permanent holes or marks on the material.
7. Practice on Scrap Pieces
Before starting your main project, practice sewing on scrap vinyl pieces. This allows you to adjust settings and familiarize yourself with the handling of the material.
8. Finishing Techniques
Consider using topstitching or applying seam sealant along the edges for added durability. This prevents fraying and enhances the longevity of your sewn vinyl projects.
9. Patience and Precision
Take your time while sewing vinyl. Rushing can lead to mistakes or uneven stitching. Be patient and maintain a steady pace for a polished outcome.
10. Cleaning and Maintenance
After sewing, gently clean the vinyl using a mild soap and water solution. Avoid harsh chemicals that might damage the fabric. Proper storage away from direct sunlight ensures the material’s longevity.
Mastering these techniques empowers you to work confidently with vinyl, unlocking endless possibilities for creative projects.
Tips to Ensure Durability
Reinforcing seams and edges with topstitching or using interfacing enhances the durability of vinyl projects. Seam sealing with specialized tapes or liquid sealants adds an extra layer of protection against moisture and fraying, ensuring longevity.
Here are essential tips to enhance the durability of your sewn vinyl creations:
- Reinforce Seams: Strengthen seams with topstitching or use interfacing to enhance durability.
- Use Seam Sealants: Apply seam sealants to prevent fraying and protect edges from wear and tear.
- Proper Cleaning: Clean gently using mild soap and water to maintain the fabric’s integrity.
- Storage: Store items away from direct sunlight to prevent discoloration and maintain quality.
- Avoid Harsh Chemicals: Refrain from using harsh chemicals that could damage the vinyl fabric.
Common Mistakes to Avoid
Understanding potential pitfalls in sewing vinyl helps in troubleshooting issues. Avoiding excessive heat, using the wrong needle, or rushing through the process prevents common mistakes like puckering or uneven stitching.
Working with vinyl requires attention to detail and specific techniques to ensure successful outcomes. Here are some common mistakes to steer clear of when sewing with this unique material:
1. Using the Wrong Needle
Selecting the incorrect needle size or type can lead to issues like skipped stitches, fabric tearing, or puckering. Always opt for a heavy-duty needle specifically designed for sewing through thicker materials like vinyl.
2. Ignoring Fabric Preparation
Neglecting to prepare the vinyl fabric before sewing can result in challenging stitching. Use clips instead of pins to avoid leaving permanent holes, and consider placing tissue paper or clear adhesive tape beneath the material to facilitate smooth sewing.
3. Incorrect Thread and Tension
Using the wrong thread weight or ignoring tension adjustments on your sewing machine can cause uneven stitches or puckering. Choose a heavyweight thread suitable for vinyl and adjust the tension settings accordingly.
4. Rushing Through the Process
Sewing vinyl demands patience and precision. Rushing can lead to mistakes, such as crooked seams or uneven stitching. Take your time to ensure accurate and neat results.
5. Excessive Heat
Applying too much heat, either from an iron or a hot presser foot, can damage the vinyl fabric. Avoid direct contact with high-temperature settings to prevent melting or warping of the material.
6. Incorrect Stitch Length
Using a stitch length that is too short can perforate the vinyl excessively, compromising its integrity. Opt for longer stitch lengths, typically around 3.5 to 4 mm, to maintain the fabric’s strength.
7. Neglecting Test Runs
Skipping practice runs on scrap pieces of vinyl before starting your main project can lead to unforeseen issues. Practice allows you to adjust settings and familiarize yourself with handling the material effectively.
8. Not Securing Seams Properly
Failing to reinforce seams or neglecting to use seam sealants can reduce the durability of your vinyl projects. Consider topstitching or applying seam sealant to prevent fraying and ensure longevity.
9. Pulling or Stretching the Fabric
Overhandling or pulling the vinyl while sewing can distort its shape and lead to misaligned seams. Guide the material gently through the machine without applying excessive force.
10. Improper Cleaning and Storage
Using harsh chemicals or improper cleaning methods can damage the vinyl fabric. Stick to mild soap and water for cleaning, and store your finished projects away from direct sunlight to prevent discoloration or deterioration.
Avoiding these common mistakes allows for a smoother sewing experience and helps produce professional-looking results when working with vinyl.
Creative Applications of Sewn Vinyl
Explore the endless possibilities of incorporating sewn vinyl into various projects. From designing custom bags, and upholstery, or even integrating vinyl elements into fashion pieces, the versatility of this material knows no bounds.
Maintenance and Care
Maintaining vinyl projects involves gentle cleaning methods and proper storage to retain their quality. Using mild cleaners and avoiding harsh chemicals ensures the longevity of the material while storing items away from direct sunlight prevents discoloration.
People also ask
Can I sew vinyl with a regular sewing machine?
Yes, you can sew vinyl with a regular sewing machine. However, it’s essential to use the right needle, such as a heavy-duty one designed for thicker fabrics, and adjust settings like stitch length and tension to accommodate the vinyl’s density.
What is the best stitch for vinyl?
A longer straight stitch or a specialized stitch like a triple stitch often works best for sewing vinyl. These stitches provide durability without perforating the material excessively.
Do I need a special needle to sew vinyl?
Yes, using a special needle designed for heavy fabrics or leather, like a size 90/14 or 100/16 needle, is recommended for sewing vinyl. These needles prevent skipped stitches and fabric damage while working with the thicker material.
What thread to use when sewing vinyl?
Opt for a heavyweight thread specifically designed for sewing vinyl. This thread is sturdy and ensures strong, durable stitches that can withstand the unique demands of sewing with vinyl fabric.
Conclusion
Sewing vinyl can be a tricky skill to master, but with the right tools, techniques, and patience, it becomes manageable.
Remember to use a heavy-duty needle, and appropriate thread, and consider using clips instead of pins.
Practice on scraps to adjust tension and stitch length, and don’t rush—take your time to ensure precise seams. With practice, sewing vinyl can lead to professional-looking results in your projects.

Hi, I am Alice, and I am your perfect guide to the world of sewing machines. With over 10 years of experience in the sewing industry, I am passionate about sharing my knowledge and expertise to help you make the most of your sewing journey. about me