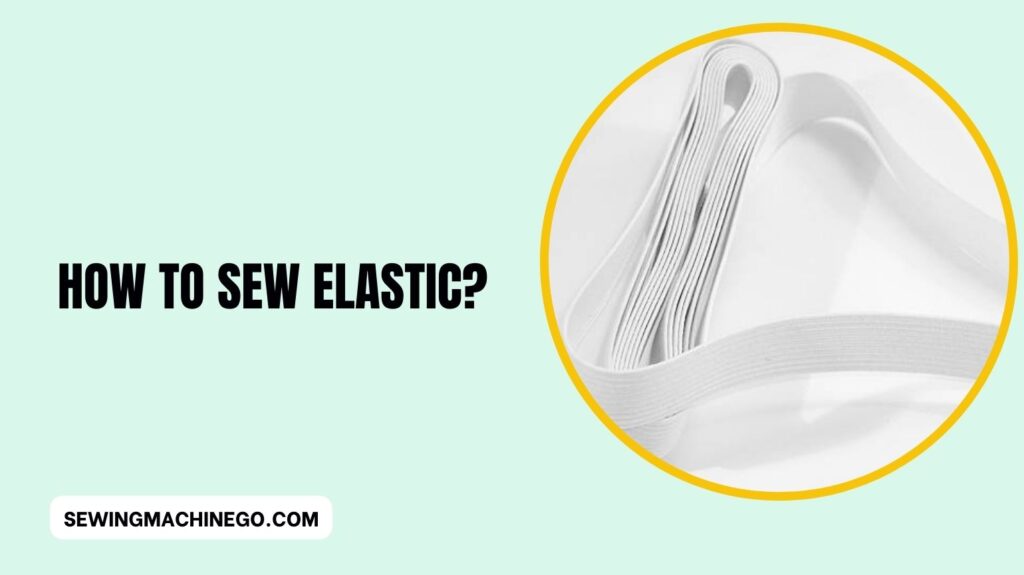
How to Sew Elastic? Step By Step Guide In 2023
In the vast realm of sewing, mastering the skill of sewing elastic opens up a world of creative possibilities.
Whether you’re a seasoned seamstress or a beginner with a passion for crafting, understanding how to sew elastic can elevate your projects to new heights.
In this guide, we’ll walk through the basics, advanced techniques, and creative applications of sewing elastic, ensuring you’re well-equipped to embark on your elastic sewing journey.
Understanding How to Sew Elastic?
Before diving into the practical aspects of sewing elastic, it’s crucial to understand the different types available. From braided to knitted elastic, the choices can be overwhelming.
We’ll explore the various options and guide you on selecting the right elastic for your specific projects.
Essential Tools and Materials
To start your elastic sewing adventure, gather the necessary tools and materials.
From a reliable sewing machine to quality fabric and basic sewing supplies, having the right equipment is essential for a smooth sewing experience.
Preparing the Fabric
Achieving a professional finish begins with proper preparation. Learn the art of measuring, cutting, and securing your fabric before incorporating elastic. This step ensures your projects have a polished and tailored appearance.
Positioning the Elastic
The success of elastic sewing lies in precise positioning. Discover how to determine the right placement for elastic and effectively pin it in place. These foundational steps set the stage for a flawless sewing experience.
Sewing Techniques
Explore various sewing techniques, from the basic straight stitch to the versatile zigzag and stretch stitches.
Each technique serves a unique purpose, and understanding when to use them will enhance the durability and aesthetics of your elastic projects.
Troubleshooting Common Issues
Sewing elastic can be immensely rewarding, but like any craft, it comes with its own set of challenges.
Here, we’ll explore common issues you might encounter during elastic sewing and provide effective troubleshooting solutions.
Elastic Slipping:
- Issue: Elastic tends to shift or slip during the sewing process.
- Solution: Ensure the elastic is securely pinned in place before sewing. Consider using a stretch stitch on your sewing machine, providing extra grip to prevent slipping.
Uneven Tension:
- Issue: The tension of the elastic varies, resulting in an uneven appearance.
- Solution: Check your sewing machine’s tension settings. Adjust the tension as needed, and test on scrap fabric before starting your project. Consistent tension is crucial for a polished finish.
Elastic Breakage:
- Issue: Elastic breaks during or after sewing.
- Solution: Use the appropriate type and size of elastic for your project. If sewing with a machine, ensure the needle is suitable for elastic materials. Additionally, consider reinforcing the ends of the elastic with extra stitching to prevent breakage.
Stitch Irregularities:
- Issue: Stitches appear irregular or skipped when sewing elastic.
- Solution: Check your machine’s needle and replace it if it’s dull or bent. Ensure you’re using the correct needle for elastic fabrics. Cleaning the machine and rethreading the bobbin can also resolve stitching irregularities.
Bunching of Fabric:
- Issue: Fabric gathers or bunches around the elastic.
- Solution: Adjust the tension on your sewing machine, ensuring it’s suitable for the fabric you’re using. Additionally, make sure the elastic is evenly distributed as you sew, preventing bunching.
Difficulty in Stretching:
- Issue: Elastic doesn’t stretch as expected.
- Solution: Double-check that you’re using the correct type of elastic for your project. Some elastics are designed for light stretch, while others offer more flexibility. Using the wrong type can affect the stretchiness of the finished product.
Visible Stitches on Elastic:
- Issue: Stitches are prominently visible on the elastic.
- Solution: Choose a thread color that matches the elastic or the fabric. Additionally, consider using a wider zigzag stitch for a more discreet appearance on elastic.
Elastic Twisting:
- Issue: Elastic becomes twisted during sewing.
- Solution: Carefully align the edges of the fabric and elastic as you sew. If using a sewing machine, guide the fabric and elastic through evenly to prevent twisting.
Elastic Not Secured at Ends:
- Issue: The ends of the elastic are not securely stitched, leading to unraveling.
- Solution: When reaching the end of your elastic, reinforce the stitching by backstitching or sewing a few extra stitches to secure the elastic in place.
Finishing Touches
Once the elastic is securely in place, master the art of trimming excess material and properly securing the ends. These finishing touches contribute to the overall professional look of your projects.
Creative Elastic Applications
Elastic isn’t just for waistbands. Discover innovative ways to incorporate elastic into garments, crafts, and accessories. Unleash your creativity and explore the endless possibilities that sewing elastic brings to the table.
Tips for Beginners
Embarking on your journey of sewing with elastic can be both exciting and a little daunting, especially if you’re new to the craft.
Here are some valuable tips to help beginners navigate the world of elastic sewing with confidence:
Start with Simple Projects:
- Tip: Begin with straightforward projects like elastic waistbands or simple hair ties. This allows you to grasp the basics before diving into more complex endeavors.
Choose the Right Elastic:
- Tip: Opt for knitted elastic as a beginner. Its flexibility and ease of use make it a great choice for various projects. Familiarize yourself with different elastic types as you gain experience.
Use the Right Needle:
- Tip: Ensure your sewing machine needle is suitable for elastic fabrics. Using the wrong needle can lead to skipped stitches or breakage. A ballpoint or stretch needle is ideal for elastic materials.
Securely Pin Elastic in Place:
- Tip: Before sewing, make sure to pin the elastic securely in place. This prevents it from shifting during the sewing process, resulting in a neater finish.
Practice Stretch Stitches:
- Tip: Familiarize yourself with different stretch stitches on your sewing machine. Practice on scrap fabric to understand how each stitch works and when to use them for optimal results.
Measure Twice, Cut Once:
- Tip: Accurate measurements are crucial in elastic sewing. Double-check your measurements before cutting the elastic and fabric to avoid errors that can impact the fit of your project.
Experiment with Scrap Fabric:
- Tip: Before starting your main project, experiment with scrap fabric. Practice sewing elastic on scraps to test tension settings, and stitch types, and to build confidence before moving on to your actual project.
Learn from Mistakes:
- Tip: Don’t be afraid to make mistakes. Every misstep is a valuable learning opportunity. Analyze what went wrong, adjust your approach, and use each mistake as a stepping stone toward improvement.
Gradually Introduce Advanced Techniques:
- Tip: Once you feel comfortable with basic elastic sewing, gradually introduce advanced techniques like shirring or decorative applications. This allows you to build on your skills progressively.
Invest in Quality Tools:
- Tip: Quality tools, including a reliable sewing machine, sharp scissors, and durable pins, can make a significant difference in your sewing experience. Invest in these essentials for smoother and more enjoyable projects.
Join Sewing Communities:
- Tip: Connect with other sewing enthusiasts online or in local communities. Sharing experiences, asking questions, and learning from others can provide valuable insights and encouragement.
Watch Tutorial Videos:
- Tip: Take advantage of online tutorial videos. Many experienced sewers share their tips and techniques through video demonstrations, offering visual guidance for various elastic sewing projects.
Be Patient and Persistent:
- Tip: Rome wasn’t built in a day, and neither are sewing skills. Be patient with yourself, celebrate small victories, and persist through challenges. Improvement comes with practice and time.
Experiment with Elastic Applications:
- Tip: Elastic isn’t limited to waistbands. Experiment with different applications, such as adding elastic to sleeves or creating gathered details. This expands your creative repertoire and keeps sewing interesting.
Enjoy the Process:
- Tip: Lastly, enjoy the process of creating. Sewing with elastic opens up a world of possibilities. Embrace the creative journey, and don’t forget to have fun along the way.
Advanced Techniques
Once you’ve mastered the basics, delve into advanced techniques such as shirring and decorative elastic applications. Elevate your projects and showcase your newfound expertise in elastic sewing.
Maintaining Sewing Equipment
Proper maintenance of your sewing equipment is essential to ensure longevity, optimal performance, and the success of your elastic sewing projects. Here’s a comprehensive guide on how to care for your sewing machine and tools:
Regular Cleaning:
- Tip: Clean your sewing machine regularly to remove lint, dust, and debris. Use a small brush and compressed air to reach areas that are difficult to clean with your hands.
Oil Moving Parts:
- Tip: Refer to your sewing machine manual to identify the moving parts that require oiling. Apply sewing machine oil to these parts as recommended to keep them lubricated and functioning smoothly.
Check and Change Needles:
- Tip: Regularly check your sewing machine needle for any signs of wear, such as bending or dullness. Change the needle as needed to prevent skipped stitches and damage to fabrics.
Adjust Tension Settings:
- Tip: Keep an eye on your sewing machine’s tension settings. Adjust them as required, especially when switching between different fabrics or elastic types, to achieve balanced and even stitches.
Thread Quality Matters:
- Tip: Use high-quality thread to prevent breakage and ensure the longevity of your sewing machine. Cheap or old threads can cause tension issues and compromise the integrity of your stitches.
Store Elastic Properly:
- Tip: Store elastic in a cool, dry place away from direct sunlight. Exposure to heat and sunlight can degrade elastic over time, affecting its stretchiness and performance in your projects.
Clean Cutting Tools:
- Tip: If you use scissors or rotary cutters for cutting elastic and fabric, keep them clean and sharp. Dull tools can lead to uneven cuts and make the sewing process more challenging.
Secure Pins Safely:
- Tip: Invest in a pincushion or magnetic pin holder to keep your pins organized and prevent accidents. Store them safely when not in use to avoid injuries and damage to your sewing machine.
Protect Your Sewing Machine Cover:
- Tip: When not in use, cover your sewing machine with a dust cover or store it in a protective case. This prevents dust and debris from settling on the machine, maintaining its cleanliness.
Exploring Elastic Brands
Navigate the world of elastic brands with insights into popular choices and reviews. Discover which brands consistently deliver quality elastic for your sewing projects.
DIY Elastic Projects
Put your newfound knowledge into practice with step-by-step guides for various elastic projects. From simple to intricate, these DIY projects offer a hands-on approach to mastering elastic sewing.
- Elastic-Waist Skirt:
- Create a stylish skirt by adding an elastic waistband. Choose your favorite fabric and enjoy a simple yet fashionable garment perfect for any occasion.
- Elastic Hair Ties:
- Craft personalized hair ties using elastic. Mix and match colors and patterns to create unique accessories that are both practical and stylish.
- Shirred Sundress:
- Experiment with shirring to make a breezy sundress. Sew rows of elastic thread for a stretchy and gathered effect, resulting in a beautiful and comfortable outfit.
- Elastic Headbands:
- Craft chic headbands with elastic for a quick and fashionable accessory. Explore various colors and patterns to match your style.
- Stretchy Bracelets:
- Delve into jewelry making by creating stretchy bracelets with elastic cord. Add beads or charms for personalized and trendy accessories.
- Gathered Shoulder Top:
- Elevate a basic top by adding gathered elastic at the shoulders. This subtle detail creates a trendy silhouette, turning a simple garment into a fashion statement.
- Elasticized Bed Skirt:
- Give your bedroom a makeover with an elasticized bed skirt. Choose a fabric that complements your bedding and customize the drop length for a polished look.
- Elastic-Bottomed Pajama Pants:
- Enhance your sleepwear by sewing pajama pants with elastic at the bottom. This not only adds comfort but also introduces a stylish element to your loungewear.
- Ruffled Elastic Bag:
- Craft a charming and functional bag with ruffled elastic. The elastic creates playful ruffles, making it a unique and textured accessory.
- Elasticized Cuffs on Jackets:
- Transform jackets or hoodies by adding elasticized cuffs. This not only provides a snug fit but also adds a modern touch to your outerwear.
- Elastic-Waist Culottes:
- Sew trendy culottes with an elastic waistband for comfort and style. Choose a flowy fabric for a relaxed and fashionable look.
People also ask
What is the best stitch for sewing elastic?
The best stitch for sewing elastic is the zigzag stitch. Zigzag stitches allow for flexibility and stretch, making them ideal for securing elastic on fabrics.
This stitch provides durability and prevents the elastic from popping or breaking during use, ensuring a secure and comfortable fit in your sewing projects.
How do you sew elastic without a casing?
To sew elastic without a casing, first, measure and cut the elastic to the desired length. Next, align the elastic along the fabric edge and use a zigzag stitch to secure one end.
Stretch the elastic as you sew, keeping it taut, and use the zigzag stitch to attach the other end.
This method creates a gathered effect without a separate fabric casing, making it quick and simple for various sewing projects like waistbands or sleeves.
How do you put elastic on an existing waistband?
To add elastic to an existing waistband, measure the length needed for a comfortable fit. Cut the elastic accordingly.
Create a small opening in the waistband’s seam, insert the elastic using a safety pin, and thread it through the casing.
Overlap the ends and secure them with a zigzag stitch. Sew the opening closed, distributing gathers evenly.
This quick alteration enhances comfort and flexibility in the waistband of your garment.
How do you thread elastic through fabric?
To thread elastic through the fabric, attach a safety pin to one end of the elastic. Insert the safety pin into the fabric casing or seam where the elastic needs to go.
Gently push and guide the safety pin through the casing, pulling the elastic with it. Once the elastic is fully threaded, remove the safety pin and secure the elastic ends together.
This method ensures a smooth and efficient process for adding elastic to your fabric projects.
Conclusion
In conclusion, sewing elastic is a skill that opens doors to a world of creativity. Whether you’re enhancing garments or crafting unique accessories,
the techniques and tips provided in this guide empower you to confidently explore the art of elastic sewing. Remember, every stitch is a step closer to mastering this versatile skill.

Hi, I am Alice, and I am your perfect guide to the world of sewing machines. With over 10 years of experience in the sewing industry, I am passionate about sharing my knowledge and expertise to help you make the most of your sewing journey. about me