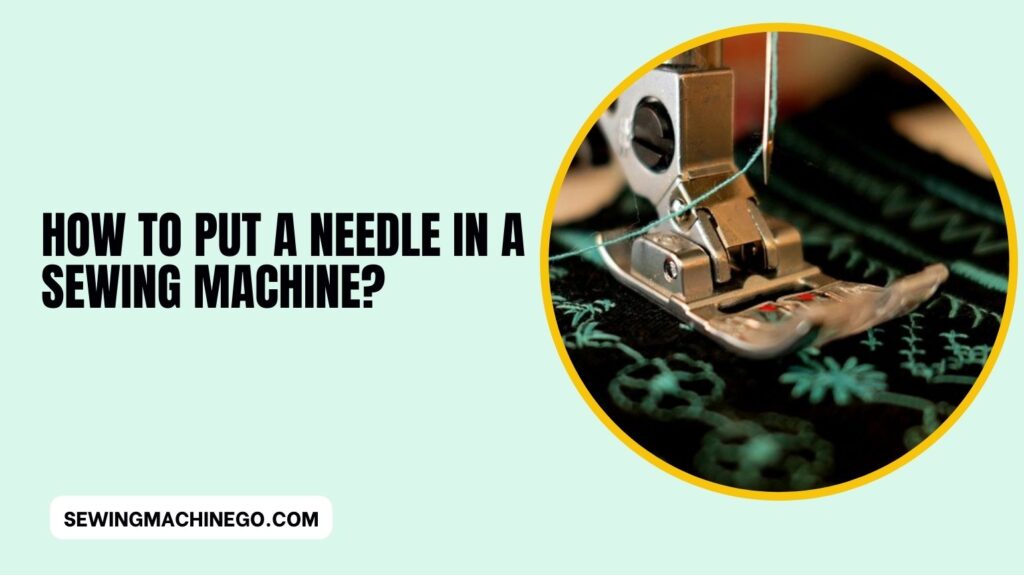
How to Put a Needle In a Sewing Machine? (Safe Guide) 2023
Embarking on a sewing journey begins with the basic yet crucial step of inserting a needle into a sewing machine. How to Put a Needle in a Sewing Machine?
Mastery of this fundamental task ensures a smooth start to your stitching endeavors. In this guide, we’ll unravel the simple yet essential process of correctly placing a needle into a sewing machine.
From understanding needle types to navigating the machine’s mechanisms, mastering this skill lays the foundation for successful sewing ventures.
Let’s dive into the essential steps to seamlessly set up your sewing machine for precise and creative stitching.
Your Sewing Machine: Navigating the Stitching Landscape
Before we embark on the journey of inserting a needle, let’s familiarize ourselves with the intricate world of sewing machines.
These marvels of technology consist of various parts, each playing a vital role. At the heart of it all is the needle, a tiny yet indispensable component that determines the quality of your stitches.
Types of Needles: Finding the Perfect Match
Not all needles are created equal. Depending on your fabric and project, you’ll need to select the right needle for the job.
The options can be overwhelming, from universal needles to ballpoint needles designed for knits. Understanding the differences will elevate your sewing game and ensure professional-looking results.
Gathering Necessary Materials: Setting the Stage for Success
Before you start the needle insertion process, gather your materials. A well-lit workspace is essential, ensuring you can see every detail.
Grab your sewing machine manual, the new needle, and maybe a cup of coffee – we’re about to dive into the world of sewing.
Safety Precautions: Stitching with Care
While we’re eager to start sewing, safety should always be a priority. Sewing machine needles are sharp, and accidents can happen.
Take a moment to read through safety precautions, and always handle needles with care. Safety first, stitches second.
When quilting with a regular sewing machine, it’s essential to prioritize safety to ensure a smooth and secure quilting experience.
Here are some key safety precautions to consider:
- Machine Maintenance: Before starting, ensure your sewing machine is well-maintained and in proper working condition. Check for any loose parts, thread tangles, or issues with the needle to prevent accidents while quilting.
- Needle and Thread Selection: Use the appropriate needle and thread for quilting projects. Ensure the needle size matches the fabric thickness to avoid breakage or damage to the material.
- Workspace Organization: Keep your workspace clear and organized. Ensure ample lighting to avoid eye strain and maintain a comfortable posture to prevent physical discomfort.
- Finger Safety: Be cautious while operating the sewing machine, especially when guiding fabric through the needle. Avoid placing fingers too close to the needle to prevent accidental pricks or injuries.
- Guiding Fabric Carefully: Always guide the fabric through the machine carefully and avoid sudden movements to prevent fabric jams or the needle deflecting unexpectedly.
- Unplug when Not in Use: When taking breaks or finishing your quilting session, unplug the machine to prevent accidental starts or children from accessing it.
- Read the Manual: Familiarize yourself with the sewing machine’s manual and safety instructions to understand its features and avoid potential hazards.
By following these safety precautions, you can quilt with a regular sewing machine confidently, ensuring a safe and enjoyable quilting experience.
Step-by-Step Guide: Mastering the Art of Needle Insertion
Now, let’s get hands-on. Follow this step-by-step guide on how to put a needle in your sewing machine:
- Turn off your sewing machine and unplug it for safety.
- Consult your sewing machine manual to identify the correct needle type for your project.
- Remove the old needle is still in place, following the manual’s instructions.
- Take the new needle and ensure it is compatible with your machine.
- Insert the needle with the flat side facing the back, pushing it up as far as it can go.
- Tighten the needle screw securely, following the manual’s guidelines.
- Use a small piece of scrap fabric to test the new needle and make any necessary adjustments.
Troubleshooting: Navigating Bumps in the Stitching Road
Encountered an issue while inserting the needle? Don’t worry; it happens to the best of us. Let’s explore common problems and how to troubleshoot them.
From bent needles to difficulty in threading, we’ve got you covered. Embarking on a sewing project can hit a few roadblocks, but fear not!
Here’s a quick guide to troubleshooting common issues and keeping your stitching journey smooth:
- Skipped Stitches:
- Cause: Dull or bent needle.
- Solution: Replace the needle with a new, sharp one. Ensure it’s the correct type for your fabric.
- Uneven Stitches:
- Cause: Incorrect threading or tension.
- Solution: Rethread your machine, ensuring proper tension adjustments. Test on scrap fabric before your main project.
- Thread Bunching Underneath:
- Cause: Bobbin issues or incorrect threading.
- Solution: Check bobbin threading and tension. Re-thread the machine, following the correct path.
- Thread Breakage:
- Cause: Tension too tight or old thread.
- Solution: Adjust tension, use quality thread, and ensure the thread is compatible with your needle.
- Fabric Pulling:
- Cause: Incorrect needle size or type.
- Solution: Choose the right needle for your fabric. Refer to your machine manual for guidance.
- Machine Jams:
- Cause: Accumulated lint or incorrect threading.
- Solution: Clean the machine regularly. Rethread, ensuring correct threading paths.
- Needle Breakage:
- Cause: Using the wrong needle for the fabric.
- Solution: Match the needle type and size to your fabric. Avoid forcing thick fabrics through a too-small needle.
- Stitching Knots at the Beginning/End:
- Cause: Incorrect bobbin threading.
- Solution: Re-thread the bobbin, ensuring it follows the correct path.
- Machine Making Unusual Noises:
- Cause: Loose parts or foreign objects.
- Solution: Turn off the machine, check for loose screws or debris, and clear any obstructions.
- Fabric Puckering:
- Cause: Incorrect needle or tension.
- Solution: Choose the right needle and adjust the tension. Test on scrap fabric to find the right balance.
Choosing the Right Needle for the Job: A Stitch in Time Saves Nine
As you gain confidence in your sewing skills, understanding the nuances of needle selection becomes crucial. Different projects require different needles, and the right choice can make a world of difference.
Dive into the specifics of needle sizes and their applications to elevate your stitching prowess.
Tips for Beginners: Setting Sail in the Sewing Sea
If you’re new to the world of sewing, fear not. Everyone starts somewhere. Begin with simple projects and gradually work your way up.
The more you practice, the more comfortable you’ll become with the entire sewing process, including inserting needles like a pro.
Embarking on your sewing journey can be both exciting and a bit overwhelming. As you set sail in the vast sea of sewing possibilities,
here are some tips to guide you through the initial stages:
- Start with Simple Projects: Begin with straightforward projects like a basic pillowcase or a simple tote bag. This allows you to grasp fundamental sewing techniques without feeling overwhelmed.
- Understand Your Sewing Machine: Take the time to familiarize yourself with the different components of your sewing machine. Read the manual thoroughly to understand its functions and capabilities.
- Practice Threading and Bobbin Winding: Before diving into your first project, practice threading the needle and winding the bobbin. This basic skill is essential for successful sewing.
- Choose the Right Needle: Selecting the right needle for your fabric is crucial. Consult your sewing machine manual to understand which needle is suitable for different types of fabric.
- Experiment with Scrap Fabric: Keep scraps of fabric to practice stitching before working on your main project. This helps you get a feel for the machine and build confidence in your abilities.
- Take It Slow: Sewing is a skill that improves with practice. Don’t rush; take your time to understand each step of the process. Quality stitches come with patience.
- Invest in Quality Fabric and Notions: While it’s tempting to use inexpensive materials in the beginning, investing in quality fabric and notions can make a significant difference in the outcome of your projects.
- Join Sewing Communities: Connect with fellow sewing enthusiasts online or in your local community. Share your experiences, seek advice, and learn from others who have navigated the sewing sea.
- Watch Video Tutorials: Take advantage of the wealth of sewing tutorials available online. Video demonstrations can provide a visual guide to various techniques and troubleshooting tips.
- Master Basic Stitches: Focus on mastering basic stitches like the straight stitch, zigzag stitch, and backstitch. These are the building blocks of many sewing projects.
- Keep Your Workspace Organized: A tidy and organized workspace contributes to a smoother sewing experience. Label your materials, keep tools within reach, and maintain a clutter-free environment.
- Learn to Read Patterns: As you advance, understanding and interpreting sewing patterns will become essential. Practice reading and following patterns to enhance your sewing repertoire.
- Don’t Fear Mistakes: Mistakes are part of the learning process. Instead of getting discouraged, view them as opportunities to learn and improve. Every seasoned seamstress started as a beginner.
- Take Breaks: Sewing can be intense, especially when working on intricate projects. Take breaks to avoid fatigue and maintain focus. A refreshed mind produces better results.
- Celebrate Small Wins: Whether it’s a neatly sewn seam or a successfully inserted zipper, celebrate your achievements along the way. Small victories build confidence and motivation.
Upgrading Your Needle Game: Beyond the Basics
When it comes to inserting a needle into a sewing machine, there’s more than just the basics. Upgrading your needle game involves exploring a variety of needle types and sizes tailored for different fabrics and projects.
Delve deeper into the world of sewing by understanding the nuances of ballpoint, quilting, embroidery, or leather needles. Consider the needle size for finer or heavier fabrics, ensuring optimal stitching quality.
By expanding your needle knowledge, you elevate your sewing experience, achieving professional results and enhancing the efficiency of your machine for diverse sewing tasks.
Needle Care and Maintenance: Prolonging the Lifespan of Your Trusty Needle
Your needle is a workhorse, but it needs some TLC too. Learn the art of needle care and maintenance to ensure a longer lifespan and optimal stitching performance.
From cleaning to proper storage, these tips will keep your needles in top shape. Caring for your sewing machine needle is crucial for optimal performance and longevity. Here are some quick tips:
- Replace Regularly: Change needles frequently, especially after every major project or when you notice signs of wear, such as skipped stitches or snagged threads.
- Match Needle to Fabric: Use the right needle size and type for your fabric. Thicker fabrics need larger needles, while delicate fabrics require finer ones.
- Avoid Bent Needles: Be cautious when sewing over pins and thick seams to prevent bending or damaging the needle.
- Quality Thread Matters: Use high-quality thread to minimize lint buildup, reducing the risk of needle clogging.
- Proper Insertion: Ensure the needle is inserted correctly, tightened securely, and aligned properly with the machine to prevent issues while sewing.
- Clean the Machine: Regularly clean the sewing machine to remove lint and debris that can accumulate around the needle area.
Common Mistakes to Avoid: Navigating the Needle Minefield
Embarking on a sewing project is an exciting journey, but the path is riddled with potential pitfalls, especially when it comes to handling sewing machine needles.
Here’s a guide on navigating the needle minefield, steering clear of common mistakes that can disrupt your sewing experience:
- Using the Wrong Needle for the Fabric:
- One size does not fit all when it comes to needles. Using the wrong needle for your fabric can result in uneven stitches, snags, or even damage to the material. Always match the needle type and size to the fabric you’re working with.
- Neglecting Needle Replacement:
- Overused needles can lead to skipped stitches, fabric pulls, and even damage to your sewing machine. Regularly replace your needle, especially if you notice any signs of wear or if you’ve completed a significant sewing project.
- Ignoring Needle Size Guidelines:
- Each sewing machine has its recommended needle sizes. Ignoring these guidelines can affect the machine’s performance and the quality of your stitches. Check your machine’s manual for the correct needle sizes it supports.
- Incorrect Needle Insertion:
- Improperly inserting the needle may lead to misalignment, affecting the stitching quality. Ensure the needle is pushed up as far as it can go, with the flat side facing the back, before tightening the screw.
- Using a Bent Needle:
- Sewing with a bent needle is a recipe for disaster. It can cause thread breakage, uneven stitches, and potential damage to your fabric. Always inspect your needle before use, and discard any that appear bent.
- Neglecting to Adjust Needle Position:
- Some sewing machines allow you to adjust the needle position. Ignoring this feature can result in uneven seams or difficulty in following seam allowances. Adjust the needle position as needed for your project.
- Skipping the Needle Threader:
- If your sewing machine is equipped with a needle threader, use it. Attempting to thread a needle manually may lead to frustration, wasted time, and potential damage to the eye of the needle.
- Forgetting to Secure the Needle Screw:
- After inserting a new needle, ensure the needle screw is tightened securely. A loose needle can cause stitching issues and may damage the machine. Refer to your machine’s manual for the proper way to secure the needle.
- Neglecting Regular Maintenance:
- Sewing machines, like any tool, require maintenance. Neglecting routine maintenance, such as cleaning and oiling, can lead to problems with the needle and overall machine performance.
- Failing to Test on Scrap Fabric:
- Before diving into your main project, always test your machine on a scrap piece of fabric. This allows you to check the needle’s performance, stitch tension, and make any necessary adjustments before working on your actual project.
- Not Adapting Needle Type to Project:
- Different projects may require specific needle types. Using a universal needle for every project might work, but adapting the needle type to your project’s requirements can significantly improve the quality of your stitches.
- Ignoring Thread Quality:
- The quality of your thread matters as much as the needle. Low-quality thread can cause lint buildup, affecting the needle’s performance. Invest in good-quality thread for optimal results.
- Not Aligning the Needle with the Fabric Grain:
- Failing to align the needle with the fabric grain can result in puckering, distortion, or uneven stitches. Take a moment to ensure the needle aligns with the fabric’s natural grain.
- Overlooking Thread and Needle Compatibility:
- Certain threads may require specific needle types for smooth stitching. Check the compatibility of your thread and needle to prevent tension issues and thread breakage.
- Ignoring Unusual Noises:
- Unusual sounds during sewing, such as clicking or grinding, may indicate a problem with the needle. Stop and investigate any unusual noises to prevent potential damage to your machine.
Personalizing Your Sewing Experience: Needles as Your Creative Allies
Personalizing your sewing experience involves recognizing needles as more than just functional tools—they are your creative allies.
Each needle type, size, and specialty serves as an artistic instrument, enabling you to express your creativity through fabric manipulation and stitching techniques.
Whether quilting, embroidering, or working with delicate fabrics, selecting the right needle empowers you to achieve the desired effects, textures, and precision in your projects.
By understanding needles as versatile companions in your sewing journey, you unlock a realm of possibilities to elevate your craftsmanship and infuse your work with personalized flair and professional finesse.
People also ask
How do you put a needle back in a sewing machine?
Here’s a concise step-by-step guide:
Turn off and unplug the sewing machine.
Remove the old needle using a screwdriver.
Insert the new needle with the flat side facing the back.
Tighten the screw or secure the clamp.
Ensure the needle is at the correct height and aligned.
How should a sewing machine needle be placed in a machine?
Insert the sewing machine needle with the flat side facing the back, and ensure it is pushed up as far as it can go. Tighten the screw or secure the clamp to hold it in place.
How do you insert a needle?
Insert the needle into the sewing machine with the flat side facing the back, and push it up as far as it can go. Secure it in place by tightening the screw or clamp.
How do you attach a needle holder to a sewing machine?
To attach a needle holder to a sewing machine, loosen the screw or release the clamp on the needle holder.
Slide the needle up into the holder with the flat side facing the back, and tighten the screw or secure the clamp to hold it in place.
Conclusion: How to Put a Needle in a Sewing Machine?
In conclusion, mastering the art of inserting a needle into a sewing machine is a fundamental skill that sets the stage for every stitching endeavor.
Following the steps outlined in this guide ensures a seamless start to your sewing project. Remember, patience and precision in this simple yet crucial task pave the way for smooth and successful sewing sessions.
With your needle properly in place, you’re ready to unleash your creativity and bring your sewing ideas to life.

Hi, I am Alice, and I am your perfect guide to the world of sewing machines. With over 10 years of experience in the sewing industry, I am passionate about sharing my knowledge and expertise to help you make the most of your sewing journey. about me